Tuesday, November 18

Vanilla Bean Panna Cotta

If you're a custard kind of person (if you said "yes", no explanation needed... if the world custard does not excite any reaction in you, then don't feel left out, but I highly recommend reconsidering the virtues of this culinary delight), like me, then its close cousin panna cotta is probably near and dear to your heart (or stomach, more likely).


Panna cotta is an Italian "cooked custard", consisting primarily of milk, cream, sugar, and gelatin to give it a sexy little wobble. As the peice de resistance at my birthday dinner last sunday night, I prepared the "Heavenly Panna Cotta" from Gina DePalma's Dolce Italiano, which is easily one of my favorite recent cookbook purchases. The panna cotta was only slightly different than the classic in that it had a healthy dose of ricotta to give it just a bit more textural interest on the tongue, and of course contributing a richness and smoothness that ricotta is so darn good at providing.

The final panna cottas were not quite flecked with vanilla bean (they all fell to the bottom, sadly. I think if I'd chilled the custard slightly, then stirred and poured into the final glasses I might have averted this, but maybe by then they'd be too set?), but they tasted indeed like heaven. I used some of the leftover raspberry sauce from my morning crepes as a topping, and highly recommend it. I like to have a little something to contrast against all that creamy, and very rich goodness, so a tart little fruit topping is just the ticket.

Heavenly Panna Cotta

1 cup fresh sheep's milk ricotta or whole cow's milk ricotta
1 cup whole milk
1 1/2 cups heavy cream
1/2 cup plus 2 tablespoons granulated sugar
1/2 vanilla bean
1 packet powdered gelatin*

Toppings: Chestnut Honey or vincotto was suggested, or try a quick berry sauce like I did

Place the ricotta and 1/2 cup milk in a medium bowl and whisk vigorously until the ricotta is smooth and lump free. Place the heavy cream and sugar in a medium saucepan. Scrape the seeds from the vanilla bean with the flat side of a small knife and add them to the pan along with the bean. Place the mixture over medium heat and bring just to the boiling point, whisking occasionally.

In the meantime, whisk the gelatin into the remaining 1/2 cup milk and set aside. When the cream mixture has scalded, turn off the heat. Whisk in the remaining 1/2 cup milk and gelatin mixture. Gradually pour the liquid into the bowl with the ricotta, whisking constantly until the mixture is completely smooth. Remove the vanilla bean an strain the mixture through a chinois or fine-meshed sieve. Divide the panna cotta among 6 dessert glasses and refrigerate until set, about 4 hours.

Before serving, drizzle the surface of each panna cotta with 1 or 2 teaspoons of warm chestnut honey or a few drops of vincotto. Or use the topping of your choice!

Cook's Note: * The recipe calls for 4 sheets of gelatin, but I couldn't find any so I substituted the powdered Knox gelatin, which worked just fine. I followed her cue that 4 sheets of gelatin is equal to one of the powdered packets.

Sunday, November 16

Crepes with Orange-Flecked Yogurt and Raspberry Sauce


I told you'd I'd planned food-related activities for my entire weekend, and here I present another piece of evidence. The buns of gluttony were Saturday morning (and again Monday morning, just as devishly delicious), and Sunday morning I took another recipe from Food and Wine as inspiration, and whipped up some yogurt-filled crepes. My first crepes ever, made with a crepe pan I got 3 years ago! My husband quipped "It's about damn time", and I agree!

Since I'm new to homemade crepes I can't speak to the perfection of the crepe recipe itself, but I'd imagine they are all fairly similar, and this one was tender and tasty, and made a nice little package for some thick Greek yogurt. The yogurt I mixed with grated orange zest, honey, and vanilla, which sounds rather ambrosial, doesn't it? to top it off, I used frozen raspberries we picked this summer and mixed them with some local raspberry jam and a squeeze of lemon, and cooked it just long enough for the flavors to get happy and jammy together.

These were so simple, and seriously good. I can't wait to make them again, and come up with some interesting new toppings and flavors for the yogurt... like lemon poppy seed, pomegranate and walnut, or even some seriously decadent options like creme fraiche and spiked berries. What flavors will you experiment with?


Crepes with Sweet Yogurt and Raspberry Sauce
Makes 8 crepes (4 servings)
Adapted from Food and Wine, December 2008

3 large eggs
1 1/4 cups milk
pinch of salt
1 cup all-purpose flour
3 tablespoons unsalted butter, melted
1/2 cup raspberry jam
1 1/2 cup raspberries (frozen)
2 tablespoons fresh lemon juice
2 cups plain Greek Yogurt
3-4 tablespoons honey
zest of one orange
1 teaspoon vanilla extract

In a medium bowl, whisk the eggs with 1/4 cup of the milk and the salt until blended. Whisk in the flour until the batter is smooht, then whisk in the remaining 1 cup of milk and 1 tablespoon of the melted butter. Let the crepe batter stand at room temperature for about 20 minutes.

In a small sacuepan, combine the raspberry jam and the frozen raspberries along with the lemon juice and cook over moderate heat until jammy, about 10 minutes. Cover and keep warm.

In a bowl, mix the yogurt with the honey and orange zest.

Heat a 10-inch crepe pan or nonstick skillet over moderate heat. Brush the pan with some of the melted butter. Brush the pan with some of the melted butter. Pour in a scant 1/3 cup of the crepe batter and immediately rotate the pan to evenly coat the bottom. Cook the crepe until lightly browned on the bottom, about 45 seconds. Flip the crepe and cook until brown dots appear on the other side, about 15 seconds longer. Continue making crepes with the remaining batter, brushing the pan with the remaining butter as needed.

Spoon 1/2 cup or so of the yogurt into each crepe and roll them up or fold. Transfer to plates and spoon the raspberry sauce over top.

Note: The crepes can be made ahead, stacked, and rewarmed in a microwave oven for about 20 seconds.

Saturday, November 15

Pecan Rolls, Gluttony


It's my birthday weekend, and not surprisingly, everything I've planned revolves around food. It's supposed to be rainy and dreary, which means baking. And last week I was gone for a long and tiring week volunteering in New Orleans, so this weekend I'm all about relaxation, sweatpants and movies. I also had the flu at the beginning of the week, so I've earned the right to a little bit of pampering, and apparently gluttony as well. I'm usually so sensible, but apparently this trait does not apply to yours truly when presented with a big steamy plate of warm, soft cinnamon pecan buns.

A few things. These are made with cottage cheese in the dough, which makes them super soft and tender, and in my mind makes them a more respectable and wholesome version of a morning bun. There's protein to balance the sugar, so that makes it borderline healthy , right? These are made almost entirely in the food processor, then rolled out and sliced, which is the fun part of making this kind of treat, so it's hardly work at all. The dough is super soft and pliable, and couldn't be easier to work with. It's also spiked with vanilla and orange zest, so it tastes heavenly. And there's no yeast or rising involved at all, so they're friendly even to those of you who don't fancy yourselves bakers.

In the spirit of gluttony and with the knowledge that there's a long winter ahead (or just because they tasted so darn good) Dustin and I at half the pan of these. Really, it sounds worse than it was.

Cinnamon Pecan Buns
Food and Wine, December 2008
Makes about 12 Buns

4 tablespoon unsalted butter, melted and cooled
3/4 cup pecans
1/2 cup light brown sugar
1 teaspoon cinnamon
1/4 teaspoon kosher salt
1 cup cottage cheese
1/2 cup buttermilk
1 egg yolk
1/3 cup granulated sugar
1 teaspoon pure vanilla extract
2 teaspoons grated orange zest (its says optional, but I wouldn't skip it)
2 1/4 cups all-purpose flour, plus more for dusting
1 tablespoon baking powder
1/4 teaspoon baking soda
1/2 teaspoon fine salt

Preheat the oven to 350 degrees. Brush the bottom and sides of a 10-inch springform pan with half of the melted butter.

In a food processor, combine the pecans with the brown sugar, cinnamon and koser salt; pulse until the nuts are almost finely ground. Transfer the mixture to a bowl and sprinkle a scant 3/4 cup over the bottom of the prepared pan. Wipe out the food processor.

Add the cottage cheese, buttermilk, egg yolk, granulated sugar, vanilla and orange zest to the processor and puree until smooth. In a medium bowl, combine the 2 1/4 cups flour with the baking powder, baking soda and fine salt; whisk to mix. Add the flour mixture to the processor and pulse just until the dough comes together; it will be quite soft and sticky.

Turn the dough out onto a lightly floured work surface and gather it into a smooth ball. Roll out the dough to an 11 x 16 inch rectangle, flouring the work surface as necessary. Brush the dough with the remaining melted butter, leaving a 1/2 inch border all around. Sprinkle on the remaining pecan-sugar mixture.

Working from a long side, roll the dough into a tight cynlinder and cut it into 1-inch slices. Arrange the slices cut side up in the prepared pan. Bake the buns in the middle of the oven for about 25 minutes, until lightly browned on top and slightly firm to the touch. Transfer the pan to a rack and let cool for 5 minutes. Remove the springform ring. Invert the buns onto a plate and carefully remove the bottom of the pan, scraping any of the pecan mixture that has sticked to the pan onto the top of the buns.

Serve warm.

Note: The buns can be prepared up to two days ahead of time and rewarmed in a 350 degree oven.

Sunday, October 26

Back in the Kitchen!


Not that I ever really left... but somehow I got sidetracked with things like getting certified to teach pilates, going to a year-long school in New York for holistic health, and moving to Vermont. Are these good excuses for leaving my blogging days behind? I'm not sure, but I hope you'll forgive me (anyone who might be out there... hello?). But I'm settled in Vermont, working for a great company, enjoying my new life here, and feeling pretty great about it all! I'm need to relax a bit though, and take time to do some of the things I love to do... which mostly revolve around life in the kitchen.


This time around I plan on more of the same - sharing delicious recipes. I'll also be talking a lot about the local scene here in Vermont, which is years ahead of all but a few other progressive food cities in the country. I have entered into a near-food-heaven, with local cheese, meats, breads and a dedication to supporting small farms and business the likes of which I've never seen. With such passion all around, it's hard not to get the bug and I'm sure I'll be showing off some of our great Vermont products from time to time, since they are often the center of my inspiration.

I hope you'll check in occasionally and see what's hot! Oh yeah, and check out the view below, from the beach right down the road from us. We love it here!

Monday, January 22

Sometimes you feel like a Nut


Months ago I was flipping through a new cookbook, The Cake Book, by Tish Boyle, and cried out, "Whoa, doesn't this look delicious?", which I often do, hoping that Dustin will agree with me and beg me to make whatever delectable treat I'm drooling over. Usually, he nods in agreement, and then I go on lusting to myself, wondering when the perfect moment will come in the future when I can pull the recipe out again. The recipe in question that warm October day was a chocolate cake....a chocolate and coconut cake - a chocolate and coconut cake with almond! It's not often I get to indulge in this combination, and I put a yellow sticky with an exclamation point on the page, and retired the book to the shelf, until my little chocolate coconut cake would spring back into my mind, demanding to be whipped up for some special occastion.

My special occasion is almost here - my father in law's birthday - and I jumped the gun and made the cake last weekend, since we'd be cooking dinner at their house saturday night. On the menu was red grouper, baked in a salt casing, served with a potato and artichoke gratin, which I whipped up, after an inspiring episode with Jamie Oliver's eggplant parmesan the week before (more on that later! it was so good, and I wanted to try the method with other veg... it works like a charm).

Back to business though. This cake started talking to me when I saw the thick unapologetic layer of coconut peaking out beneath a silky ganache top, resting on top of a rich and heady layer of almond-paste infused chocolate cake. And with just two little tablespoons of flour, I knew this bad boy was going to be dense and so moist. The batter for the cake was a snap to make, although my pan was about an inch too small, and so it took much longer to bake, and I impatiently pulled it out too early, so it sank quite a bit in the middle, but I had no fear. Because of the large crater in the center of the cake, the coconut layer was especially thick in the middle, but I'm pretty sure no one minded.

This is the best cake I've made in years. Seriously. Everyone was moaning over their dessert plates, having declared themselves "too full for dessert", then reaching for crumbs and slicing off tiny slivers as the night wore on. If you're thinking this cake looks rich, you're right, but it's not too sweet, and if you love almond, you're going to love the almondy chocolate cake layer - I'm already picturing some intense cupcakes, topped with a coconut frosting, or cream cheese center.... Yum! Tish Boyle's book has received much praise (especially here), and from what I can tell, all the praise is much deserved.

Chocolate Almond-Coconut Cake
From The Cake Book, by Tish Boyle

For Cake:
2 tablespoons all purpose flour
½ cup plus 2 tablespoons Dutch-process cocoa powder
12 ounces canned almond paste
1 ¼ cups granulated sugar
4 large eggs
1 cup unsalted butter, softened
1 large egg yolk
For Coconut Layer:
2 ⅔ cups unsweetened coconut
½ cup light corn syrup
For Chocolate Glaze:
6 ounces bittersweet chocolate, coarsely chopped
⅓ cup heavy (whipping) cream
1 teaspoon vanilla

For the Cake Position a rack in the center of the oven and preheat the oven to 350 degrees. Grease the bottom and sides of a 9 x 13 inch springform pan. Line the bottom of the pan with a round of parchment paper and grease the paper.

Sift together the flour and cocoa powder into a medium bowl. Whisk to combine, and set aside.

Break the almond paste into 1-inch chunks and place it in the bowl of an electric mixer. Add the sugar and 1 of the eggs and, using the paddle attachment, beat the mixture on low speed until smooth, about 1 minute. Add the softened butter and beat on medium speed until light, about 3 minutes. Add the remaining 3 eggs, one at a time, beating well after each addition and scraping down the sides of the bowl as necessary. Beat in the egg yolk. At low speed, add the cocoa mixture, mixing just until blended.

Remove the bowl from the mixer stand and stir a few times with a rubber spatula to ensure that the batter is evenly blended. Scrape the batter into the prepared pan and smooth it into an even layer.

Bake the cake for 40 to 50 minutes, until the top is firm and a toothpick inserted into the center comes out with a few moist crumbs sticking to it. Cook the cake in the pan on a wire rack for 20 minutes.

Remove the sides of the springform pan. Place a 9-inch cardboard cake round on top of the cake and invert. Remove the bottom of the pan and the parchment paper. Cool the cake completely on the wire rack.

Make the Coconut Layer Place the coconut in the bowl of a food processor and pulse until finely chopped. Add the corn syrup and pulse until the coconut is evenly moistened.

Make the Chocolate Glaze Place the chocolate in the bowl of a food processor and process just until finely ground. Leave the chocolate in the processor. In a small saucepan, bring the cream to a boil. Remove from the heat and add the chocolate to the pan. Stir until the chocolate until completely melted and the glaze is smooth. Stir in vanilla. Transfer the glaze to a small bowl and cover the surface of the glaze with a piece of plastic wrap. Let cool for about 10 minutes before using.

Assemble and Glaze the cake
Spread the coconut mixture over the cake in an even layer. Set the cake on the wire rack, over a sheet of wax paper. Pour the warm glaze over top of the cake and use a small offset metal spatula to smooth it evenly over the top and sides. Refrigerate the cake until the glaze is set, about 20 minutes.

Serves 6-10, depending on who's eating....

Monday, January 15

Summer Posole, in January


Surely this isn't the first time in history that there have been some warmer-than-average days in January, but considering the growing hysteria surrounding global warming, these mild days should be panic-inducing, shouldn't they? I try to consider the fate of humanity as I'm out jogging in a tee shirt and shorts, however my mind usually wanders, and I end up admiring the blue skies and warm breezes on my face. And on a beautiful day, even though it may say January/Janvier/Januar/Enero on my calendar, the opportunity to eat a little lighter presents itself, and I gladly oblige.

I've posted before on the bounty of delicious goods I ordered awhile back from Rancho Gordo, and I'm still working my way through my supply of beans and other goodies, including a bag of dried hominy. Hominy is dried corn kernels, which when simmered for hours (yes, 3 or 4), puff up and become chewy little corny-sweet nuggets. I'm not sure how someone else might describe them, to me this seems perfect description, and I find them irresistable.

The recipe for this Summer Posole is straight from the Rancho Gordo website, courtesy of Deborah Madison, grande dame of vegetarian delights. The dish is a visual and textural stunner, with 5 different shades of green, and textures ranging from chewy (hominy) to crunchy (cabbage), to soft and creamy (avocado). The whole dish is brightened up with the addition of an ample squeezing of lime, both in the cilantro-avocado salsa, and as a finishing garnish. Serve this with a tortilla, and you've got a meal that's fun to eat, and that won't weigh you down - light and refreshing. We all need more meals like that in our lives, don't we?

As for this string of warm weather, I think it's on it's way out, and with it, maybe a little peace of mind will come our way too. Mine will only last as long as it takes Netflix to send me my next movie on the list - An Inconvenient Truth.

Tuesday, November 14

Pomegranate Pork Chops with Winter Tabbouleh


Casa Moro is a book I coveted for a long time before buying a few months ago. I'd read so much about it in the blogging world, that I knew it had to be good. It's a colorful and beautiful book. It's pages are full of the commentary of an English family living in Spain - a couple and their two adorable children. The food is full of robust flavors, but the recipes are all very authentic, and they promise meals that are simple and delicious, like the foods that families serve in their homes all over the Mediteranean.

I took one look at the Winter Tabblouleh recipe and knew it would be the first thing I would make. I'd never really seen a recipe like it, and it looked gorgeous - bulgar, cauliflower, walnuts, pomegranate seeds, mint and parsley - just the sort of dish to lift your spirits in the dark days of winter.

I had some great looking pork chops I wanted to serve with the tabbouleh, and it was a cold night, so instead of creating a raw salad, I decided to cook the vegetables before assembling the salad. I had never used pomegranate molasses before, and was excited at the chance to pull it out of my cupboard, where it's been gathering dust for over a year now. The dressing for the tabbouleh was dead simple - pomegranate molasses, cinnamon, a crushed garlic clove, water, olive oil, salt and pepper. At first taste, I was worried - the molasses tasted like cherry cough syrup to me.... but after letting it sit for awhile, I returned and found that it had transformed into a much more sophisticated version of what I had tasted just 20 minutes before - the sweetness had mellowed and I was intrigued - this was a taste I'd never experienced before.

A last minute decision on my part turned the dressing for the salad into a sauce for the pork; I had browned the chops on the stovetop, then added some stock and popped them in the oven to finish cooking. When they were done, I removed the pan from the oven, set the chops aside, and added the pomegranate dressing to the pork juices and stock in the pan and cooked briefly to make a thick, dark sauce to pour over the pork.

I was pretty excited about how this dish turned out - the sweetness of the pomegranate molasses and the warmth from the cinnamon were a great match for the pork, and the tabbouleh salad was a fun contrast of flavors and textures. It's not often I get make something that I feel is truly different than anything I've made before, but this dish was one of those - it sort of opened my eyes again to the fact that there plenty of foods and combinations out there that I have yet to discover and explore in my own kitchen.

Pomegranate Pork Chops with Winter Tabbouleh
Partially adapted from Casa Moro Cookbook

For the Pork:
2 center cut pork loin chops
1 Tablespoon pomegranate molasses
1 Tablespoon water
1 teaspoon cinnamon
3 Tablespoons extra-virgin olive oil
1 clove garlic, crushed
Salt and pepper

For the Tabbouleh
1 cup coarse bulgar
1 1/2 cup boiling water
1 Tablespoon olive oil
1 cup cauliflower florets, chopped into bite-size pieces
1 small fennel bulb, chopped into bite-size pieces
1 leek, sliced in half lengthwise, then into 1/4-inch pieces
1 clove garlic, minced
1/2 cup white wine or chicken broth
1/2 cup walnuts, toasted
1/2 cup pomegranate seeds
1/4 cup fennel fronds, chopped

To prepare the dressing:

Combine the pomegranate molasses, cinnamon, and water, and whisk to combine. Add the garlic clove and season with salt and pepper. Set aside.

To prepare the tabbouleh:

Preheat the oven to 350 degrees. Place the walnuts on a baking sheet and bake for 5-7 minutes, until lightly toasted. Remove from the oven and cool before coarsely chopping. Set aside. Leave the oven on for the pork.

Combine the bulgar and boiling water in a medium bowl and set aside to let the bulgar absorb the water. Heat the olive oil in a medium saute pan over moderate heat. Add the leeks, fennel, and cauliflower and cook gently to release their flavors and soften. Season with salt and pepper. When the leeks are beginning to soften, add the garlic cook until fragrant, adding the wine or broth, then turning up the heat briefly, to reduce the liquid. When the pan is almost dry again, remove from the heat and add the vegetable mixture your serving bowl. Add the bulgar, draining any extra liquid before adding.

When the salad has cooled, add the walnuts, pomegranate seeds and fennel fronds. Toss lightly to combine. Drizzle with additional extra-virgin olive oil if desired.

To make the chops:

Drizzle the chops with olive oil and season with salt and pepper on both sides. Heat a saute pan over medium heat, adding olive oil to the pan once it's hot. Add the chops and saute on each side until golden brown. Before adding the chops to the oven, add about a half cup of broth to the pan. Depending on the thickness of the chops, they should take anywhere from 10-25 minutes to finish cooking. When the chops are cooked through, remove the pan from the oven and set the chops aside on a plate while you finish the sauce. Return the pan to the stovetop, (be careful not to grab the hot handle - ouch!), adding the pomegranate dressing and cooking over medium heat to reduce the sauce slightly. When the sauce has reach your desired consistency, remove from the heat.

To plate the dish, add some of the tabbouleh to the bottom of your serving bowls or plates, then top with a pork chop. Drizzle the sauce over the pork, and serve!

Serves Two

Monday, November 13

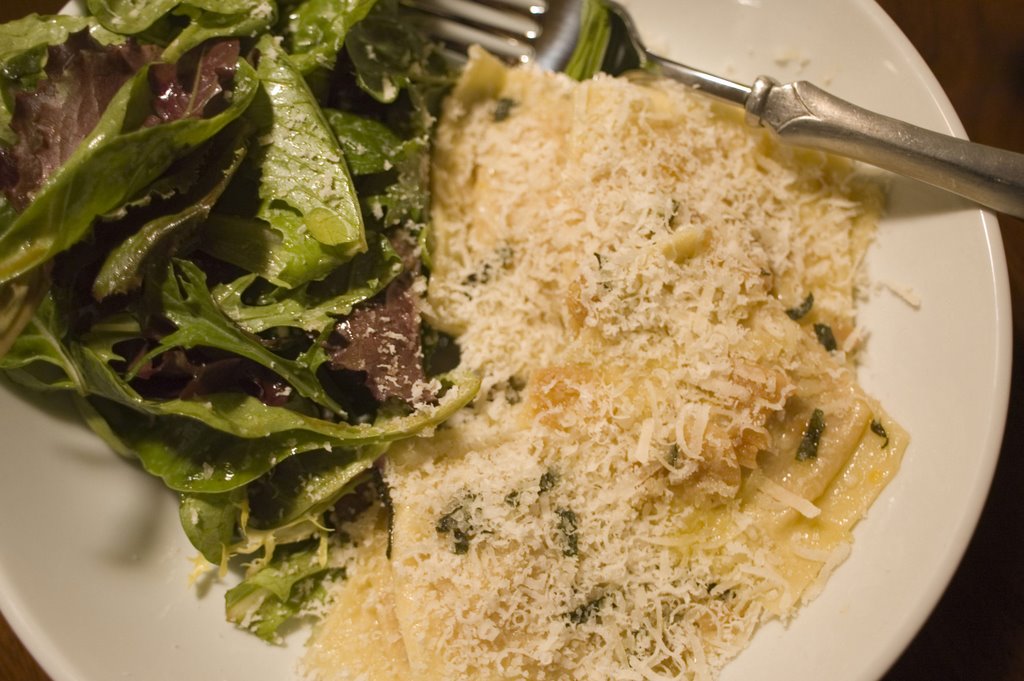
Squash Ravioli with Garlic, Olive Oil and Crispy Sage


Oh my. This dish was quite possibly the best thing to ever come out of my kitchen. At least in recent memory. I've been somewhat hesitant to try my hand at homemade ravioli in the past, but yesterday was the type of day, where after our breakfast plates had been cleared, and our bellies full of the best buttermilk pancakes ever, I didn't skip a beat before pulling the flour and eggs out of the cupboard again.

I made another loaf of the Cracked Wheat Walnut Cider Loaf, which this time turned out fantastically round and domey-topped, and I decided to conquer my irrational fear of filled pasta. I used some leftover diced squash to create the filling by sauteing shallots and garlic over low heat until they were golden and tender, then I added cider and chicken stock, covered it and cooked until soft. I mashed it up, added some parmesan, and let it rest while I went on to make my pasta.

I had some pasta flour from Williams Sonoma, which I started with, but didn't have quite enough, so I made up for the difference with a blend of semolina and all-purpose flours, which turned out to be a happy substituion. The semolina gave the pasta a lovely golden-flecked appearance, and just a little more texture and bite than my normal pasta recipe. After a late-afternoon matinee, it turned out to be too late to make raviolis, so we had Chipotle (oh how I love thee), and I stayed up until 11 pm watching Brothers & Sisters new favorite show), and making these little devils. They say that raviolis are a labor of love, and they are - and they are so worth it.

When I had finished the production work, I tossed the raviolis in flour and carefully froze them for us to enjoy for the next few weeks. After work today, I made a quick garlic and sage infused oil, which I emulsified with some pasta water to create a light and fragrant sauce to coat the raviolis before they received their sprinkle of parmesan. These babies were so good, I couldn't help but profusely praise myself throughout the course of dinner - poking and prodding Dustin for some compliments to the chef on her outstanding achievement. Even better than Dustin's compliments though, were the satisfaction I got in knowing that I made something that tasted so damn dreamy.

This is a great technique to use if you're a little squimish of dressing your pasta in ungodly amounts of butter, which is the usual accompaniment to squash raviolis. The process of boiling the flavored fat with pasta water creates a light yet satisfying sauce which clings to the pasta and gives them a luxurious mouthfeel.

Squash Raviolis with Garlic, Olive Oil and Crispy Sage
My own creation
This makes about 6 servings

Pasta:
2 cups assorted flours, such as a blend of semolina and all-purpose
3 eggs

Filling:
1 Tbsp olive oil
4 large shallots, sliced
4 good-sized cloves of garlic, sliced
1/2 cup apple cider
1 1/2 cup chicken broth
1/3 cup grated parmesan cheese
Salt and pepper to taste

Sauce:
2 Tbsp olive oil
5 garlic cloves, sliced
8 large sage leaves, sliced into 1/4 inch strips

To make the pasta: Combine the flours in a large bowl and toss together with your hands. Break the eggs into a separate small bowl, and whisk with a fork. Add the eggs to the flour mixture and use the fork to gently incorporate the eggs into the flour, using your hands to finish the dough by squeezing and working it to combine the two elements evenly. Turn the dough out onto a clean counter and knead it until it is smooth and has a uniform appearance. Wrap the dough in plastic wrap and let rest in the fridge. Remove the dough 30-40 minutes before you plan on rolling it out.

To make the filling: In the meantime, heat the olive oil over low heat in a medium heavy saucepan. Add the shallot and garlic, and cook slowly until golden and soft. Season the mixture with salt and pepper. Add the cider and broth, and bring to a boil. Cover and reduce the heat to low and simmer until the squash is very tender, about 30 minutes. Remove the lid and mash the squash to an even consistency - don't worry about getting it entirely smooth. The roasted shallot and garlic with provide a little bit of texture to the mixture. Cook the squash a little longer over low heat to reduce if necessary. You don't want the mixture to be thick, but you don't want it too wet either. Remove the pan from the heat and stir in the parmesan.

To assemble: Divide the dough into 4 equal pieces and gently flatten the discs. Use a pasta machine to roll out the pasta into thin sheets. Line up one sheet at a time and place a tablespoon of filling at a time on the sheet, about 1 1/2 inches to 2 inches apart, in the center of the bottom half of the pasta sheet. Use your finger to run water along the bottom edge and in between each dollop of filling, and fold the top half of the pasta sheet over to cover the bottom, lining up the edges if you can. Use the side of your palm to press the two halves together, working out the air bubbles as you can. Once your filling is secure inside the pasta, use a knife to cut the raviolis and trim the edges. Repeat with remaining dough and filling. While you are assembling, take care to cover the finished raviolis so they don't dry out. I tossed my in flour then lined them up on a wax paper covered cooling rack to freeze in an even layer.

When you're ready to make the raviolis, heat your olive oil over low heat with the sliced garlic, and cook until the garlic has turned golden and soft. Remove with a slotted spoon and set aside. Add the sliced sage leaves to the garlic and cook until they are crisp. Remove with a slotted spoon and set aside with the garlic.

Boil a pot of water to cook the raviolis, and salt generously. Toss your raviolis in (We did 8 per person, which was about perfect) in the water and cook gently, in batches, reserving them in a small bowl as they are cooked through, which takes about 3 minutes.

Take about 1/2 cup of the pasta water and add to the pan with the oil, turning up the heat and simmering to emulsify. Toss the water and oil in the pan to help the emulsification along. Add the cooked raviolis, reserved garlic and sage to the pan and toss several times to coat the raviolis with the sauce. Serve with a sprinkling of parmesan over top and enjoy immediately!

Monday, October 30

Guilty.


Yes, I've been known to sneak all the cherries out of the fruit bowl, and I've been caught more than once stealing extra frosting off the cake to put on my slice. I've even developed a reputation with my mother-in-law as that elicits warnings whenever one of her poundcakes and yours truly find themselves in the same room together... I will shamelessly cut just the crust off the poundcake, and leave that naked wobbly slice there in cold to fend for itself. I am guilty as charged of non-egalitarian eating. Forget the notion of building up to the climax, or saving the best for last, or even the idea that you don't deserve the frosting unless you eat the cake with it.

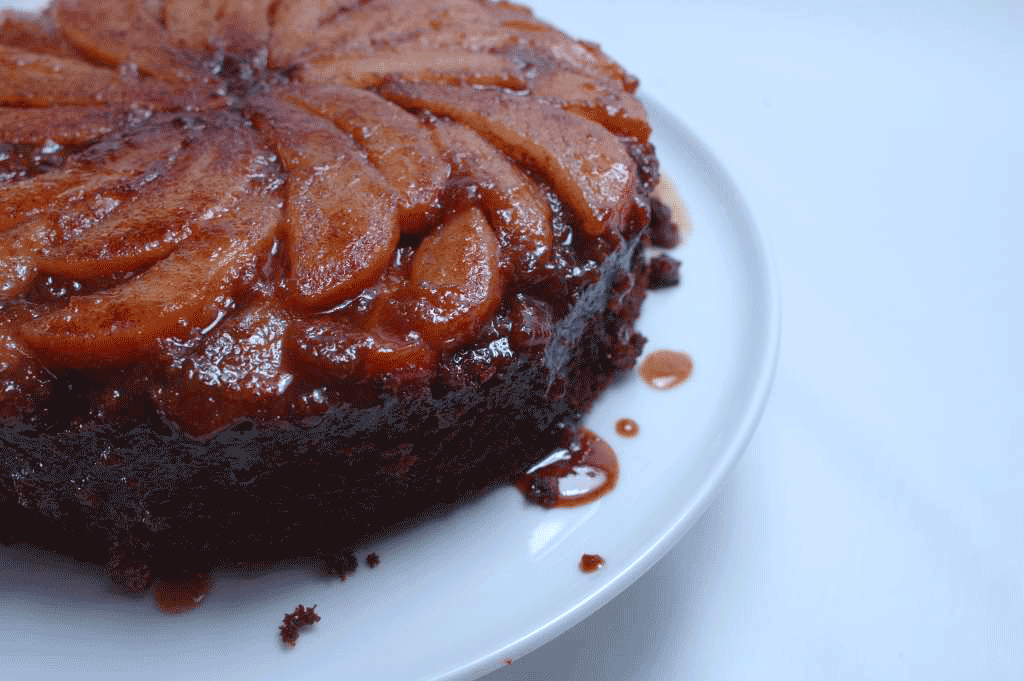
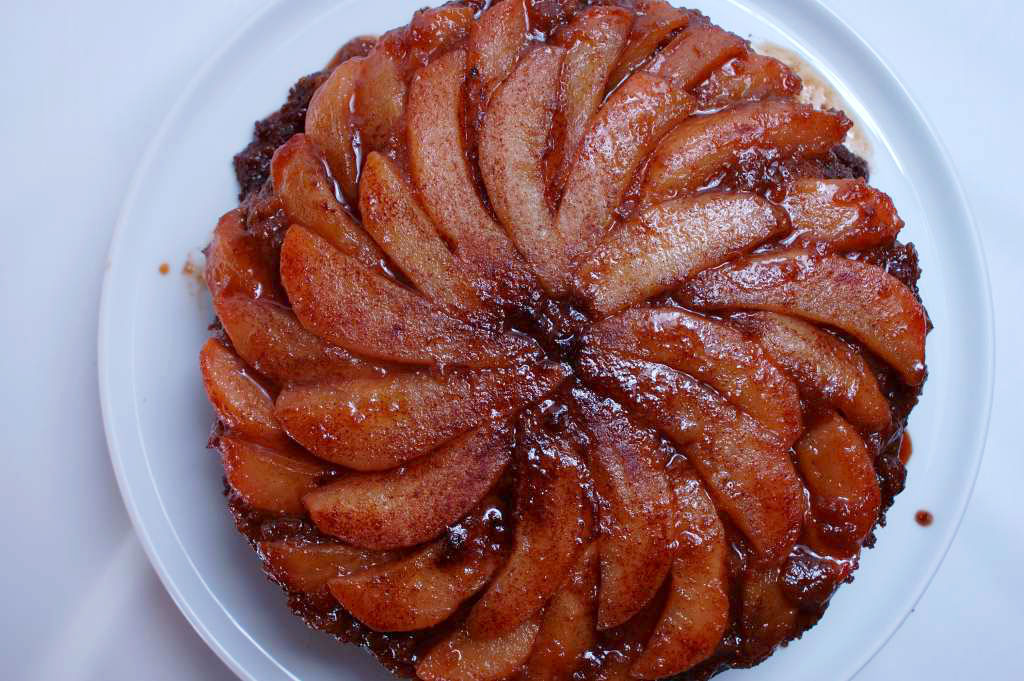
I'm not totally without dignity though. Ideally, a dessert or anything else for that matter, should be so good through and through that you don't want to give up a single crumb. It's a fine eating experience that finds you meticulously planning each bite so that you end with the ideal ratio of crust to the soft center, cake to frosting, or in this case, warm, gooey pears, and oh-so-tender gingerbread.

I have to admit there was nothing wrong with this cake, but last night, around 10:00 pm, eastern standard, you could find me hovering over the cake plate, slicing off the top half of a second piece of cake, just so I could eat the goopy pear topping, which had somehow transformed itself in the oven to a almost pudding-like texture. I threw the rest of the piece of the cake away, and never looked back.

I had read a few rave reviews of this cake in various places online, and when I recently bought Leslie Mackie's Macrina Bakery and Cafe Cookbook, it was one of the first recipes I tagged to try (after the Cracked Wheat Walnut Cider Loaf). I was torn between trying this recipe and a very similar recipe out of one of my favorite cookbooks, but ended up deciding on Leslie's recipe because of the copious amount of buttermilk called for - surely a sign of a tender and deliciously moist cake.

This cake was good, but admittedly, I don't think I'd make it again. Not to say that you might not love it, but although I loved how tender and moist the cake turned out, I expect something different from my gingerbread. I want it to be sticky, dark, and dense. I should also admit that skipping the fresh ginger might have made the cake less spectacular, so if you want to try this cake, definitely go for the bite of fresh ginger (mine was moldy, so I passed). I think a scoop of vanilla ice cream, or whipped cream would have been a wonderful accompaniment.

Ginger Pear Upside-Down Cake
Adapted Slightly from Leslie Mackie’s Macrina Bakery & Café Cookbook

The Pear Topping:
3 Tbs unsalted butter
½ cup light brown sugar
1 ½ tsp ground cinnamon
4-5 medium to large ripe (but not soft) pears, peeled, cored, and quartered lengthwise (I had to cut mine into eigths to make it work out)

The Gingerbread:
8 ounces (2 sticks) unsalted butter, at room temperature
¾ cup light brown sugar
2 Tbs peeled, grated ginger (I substituted 2 teaspoons ground ginger)
3 large eggs
2/3 cup molasses
3 cups unbleached all-purpose flour (I substituted a combination of spelt and whole wheat pastry flour)
1 ½ tsp baking powder
1 ½ tsp baking soda
½ tsp salt
1 ½ cups buttermilk, room temperature


Preheat the oven to 325 degrees Fahrenheit. Butter a 9-inch springform pan, and line the bottom with a 10-inch circle of parchment paper.

For the pear topping, combine 3 Tbs butter, ½ cup brown sugar, and cinnamon in a medium saucepan. Melt the butter over medium low heat until melted; then pour the mixture into the prepared springform pan, completely coating the parchment paper. Place the quartered pears on top of the butter-sugar mixture, lining the pieces up in a circle so that the entire bottom of the pan is covered.

For the gingerbread, cut 2 sticks of butter into 1-inch pieces, and put them in a large mixing bowl. Add ¾ cup brown sugar, and cream the mixture on medium speed for 3-5 minutes, until it is smooth and pale. Add the grated ginger (if using), and beat 1 minute more. Scrape down the sides of the bowl with a rubber spatula. Add the eggs one at a time, beating on low speed and making sure that each egg is fully incorporated before adding another. When all the eggs have been added, slowly pour in the molasses and beat to fully mix. The mixture might look as though it is curdling, but don’t worry—it will come together.

In a separate medium bowl, sift together the flour, baking powder, baking soda, (and ground ginger if using) and salt. Whisk to fully combine.

Alternately add small amounts of flour and buttermilk to the batter, stirring and folding with a rubber spatula until the dry ingredients are just absorbed. Do not overmix the batter. Pour and scrape the batter into the pear-lined pan, smoothing the top with a rubber surface. The pan will be nearly full.

Carefully transfer the pan to the center rack of the oven, and bake for about 1 hour and 45 minutes, until a skewer inserted in the cake’s center comes out clean. Let the cake cool in the pan for 10 minutes on a wire rack. Cover the pan with an upside-down serving plate; then carefully invert them together. Release the sides of the pan, and lift it away. Gently lift the pan’s base off the cake, and peel away the parchment paper. Allow the cake to cool for a half hour or so, and serve warm, with whipped cream.


Note from the Baker :

I had quite a lot of batter leftover, so I used some of my silicone canneles molds, and got 8 little mini gingerbreads out of it; not sure where all the extra batter came from, but the little cakes sure turned out cute!

Monday, October 23

When Work Takes Over...


Whoa - work has been so busy lately that I've barely had time to exhale, and least of all, get into the kitchen and cook something worth posting about! My position at work has shifted over the last month, and I'm basically learning on the job - figuring it out as I go now - which means a new level of stress that I'm not yet used to.

This is great for my career, but I need to tilt the scales a bit and get back in balance. I've hated not having time to dreamily flip through my cookbooks on the weekend and choose our menu for the upcoming week - lately it's been a mad rush to the store on the way home from somewhere else on Sunday evening, and by the time we eat most nights, I'm already thinking about something else before I've finished my last sip of wine, and I'm back to the computer or books.

Well, I've had enough of that! Cooking is a part of my life - a passion that I'm not ready to sacrifice to a busy schedule.

This Sunday Dustin and I were trying come up with a list of dishes that we haven't eaten in a long time, since we've been relying on old standards lately. Our list is our menu for this week - Roast Pork with Brussel Sprouts, Pesto Chicken Pasta (to use up the 4 pounds of basil still in the garden), a Squash Souffle (from this month's Gourmet), Risotto with Raddichio, and finally, our Sunday night Supper - Chilaquiles.

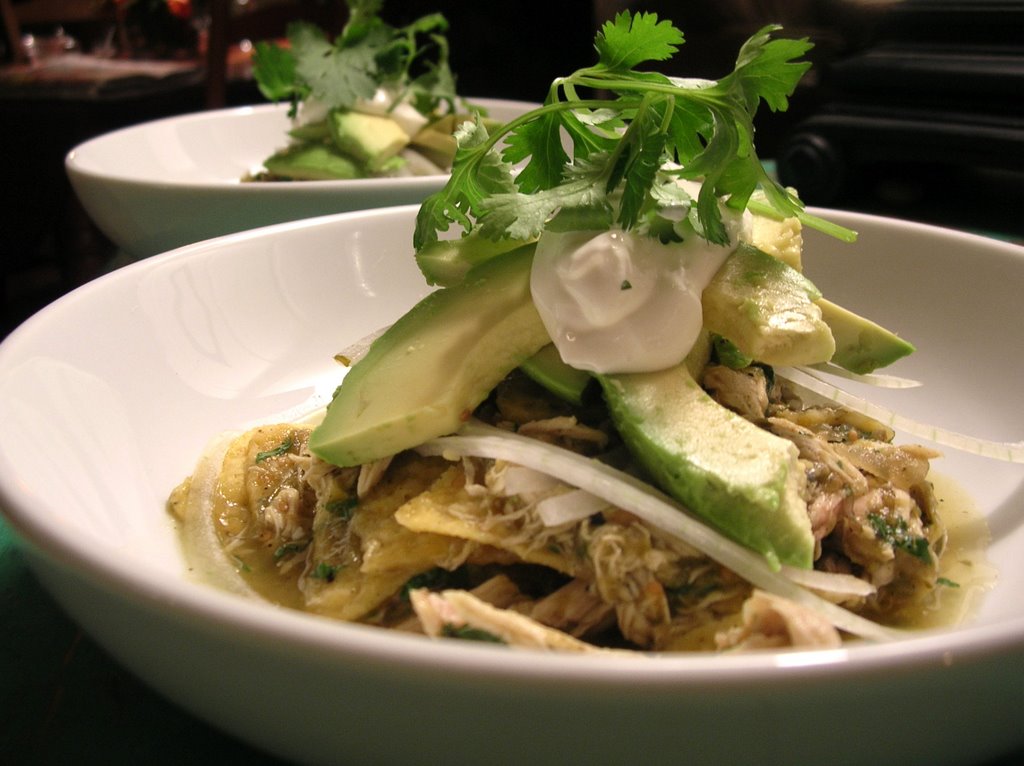
If you've never had Chilaquiles before, and have been turned off by their messy and unsophisticated nature - think again. Chilaquiles are everything that I love about Mexican Food - warm, rich with the flavor of toasted corn and smoky chiles, and a fabulous excuse to eat all the best condiments - Avocados, Sour Cream, Crumbly, Salty Cheese, and Cholula. With a cold beer, it's the perfect thing to remind me why I love to spend time in my kitchen - to slow down, create something beautiful and delicious, and celebrate daily life.

This recipe is wonderfully simple, but if you want to make it even simpler, you could substitute a good-quality Tomatillo Salsa for the Homemade. It will lack some of the sweet nuance of a homemade sauce, but I'll admit it's just as good. I've had good results with Rick Bayless' Tomatillo Salsa, sold in Whole Foods.

Chilaquiles with Salsa Verde
Adapted from Mexican, by Williams Sonoma

1 lb. tomatillos, husked and rinsed
4 serrano chilies
2 cloves garlic
½ white onion, coarsely chopped, plus 1 or
more thin white onion slices, separated into rings for garnish
1 tablespoon canola or safflower oil
A pinch of sea salt, plus more, to taste
½ lb. thick tortilla chips (the thicker the better)
2 cups shredded chicken (optional, but recommended)
¼ cup coarsely chopped fresh cilantro, plus leaves for garnish
1 cup crema or sour cream
½ cup crumbled queso fresco or mild feta cheese
1 Avocado, sliced into thin lengths

Place the tomatillos in a small saucepan and add water to barely cover. Bring to a simmer and cook until the tomatillos soften, about 10 minutes. Add the chilies and garlic and continue to cook until the tomatillos are completely soft, about 5 minutes more. Remove from the heat.

Using a slotted spoon, transfer the tomatillos, chilies and garlic to a blender; reserve the cooking liquid. Add the chopped onion and 1/2 cup of the cooking liquid to the blender and process until well blended.

In a heavy skillet or saucepan over medium-high heat, warm the oil. Pour in the tomatillo mixture all at once and stir vigorously. Stir in an additional 1⁄2 cup of the reserved cooking liquid along with a pinch of sea salt. Reduce the heat to low and cook, uncovered, until the sauce thickens, about 10 minutes. Add more liquid if necessary.

Just before serving, carefully fold the tortilla chips, chicken and cilantro into the sauce and continue cooking until softened but not mushy, about 5 minutes. Taste and adjust the seasonings with sea salt.

Scoop the mixture into 4 shallow bowls, and top with sliced onion rings, sour cream, queso, avocado and additional cilantro leaves, if desired. Serves 4.

Serves 4

Monday, October 2

Love, Despite Looks


This loaf of bread had me worried. I paused my breadmaking session on Sunday while Dustin and I went for an impromptu two and a half hour walk, and stuck my bread in the fridge to tame those hungry little yeasts while we were gone, which I've heard is a legitimate thing to do, but when I returned from my walk, I opened the refrigerator door in anticipation, and my bread had risen so high that it was squished up against the top of the next shelf!

If I were a calm and patient baker, I would have punched down the loaf, rolled it up again into a little swaddle of bread dough, and let it rise while we had our Spaghetti and Meatballs for dinner (it was my turn to choose our Sunday supper), and then popped it in the oven and all would have been tall and rounded in the land of happy bread loaves. Instead, I chose to make due with the deformed loaf I had on my hands, and throw caution to the wind by sending it off to meet it's fate in a 385 degree oven.

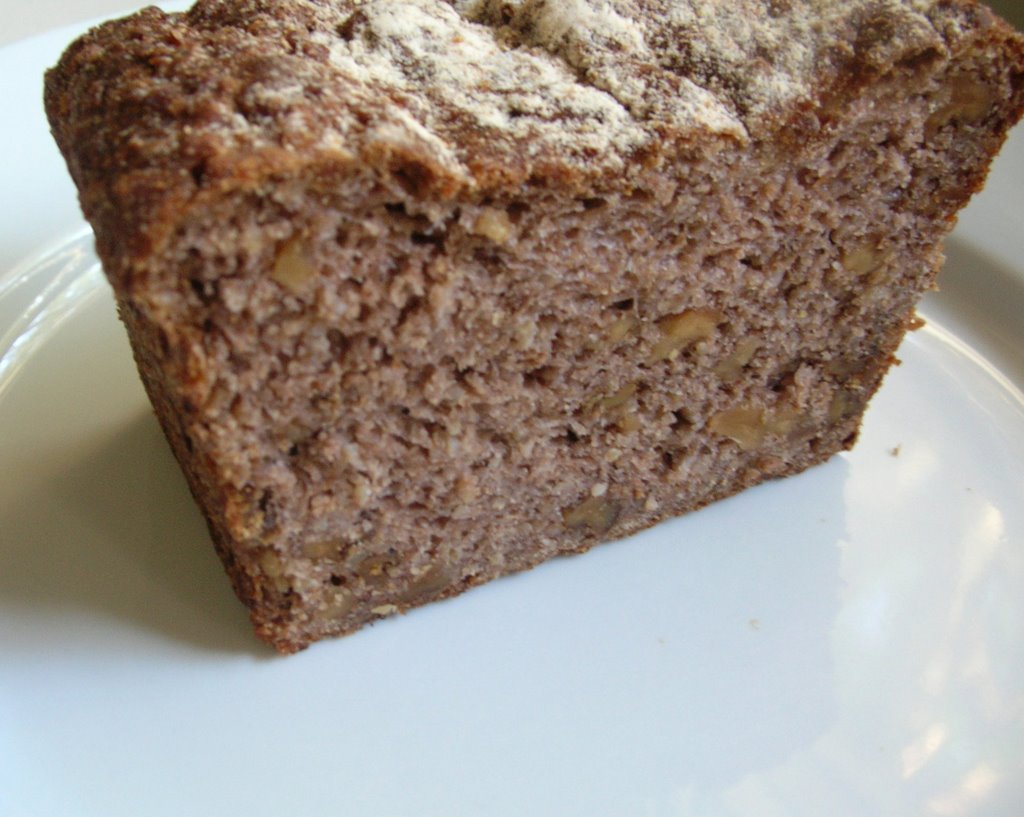
The loaf came out flat and rather homely looking, but I wasn't about to give up on it just yet. I mean, if ever a bread and I were destined for true love, it had to be this Cracked Wheat Walnut Cider Loaf. Wholesome and rich with the taste of toasty walnuts, along with the substance and toothsome quality that bulgar would add, and the seductively unknown taste of cider in a loaf of bread? Wow, I'm still getting excited about it again, even after my botched first attempt.

The point is though, despite appearances, this is a bread to love. It might not seduce you with a tall and stately domed top, or a golden brown crust, but what it lacks in beauty, it makes up for in character. The bread turned out a fabulous purplish shade of brown, flecked with walnuts and bits of bulgar, and it is so wonderfully moist. I had a slice for breakfast with some pumpkin butter, and a slice for lunch with my broccoli soup. Plans for the rest of the loaf include a turkey and munster sandwich tomorrow, and then it's going to play host to some creamy goat cheese, served alongside a bowl of lentils for dinner tomorrow. This is one hardworking bread!

I have plans to make this bread again very soon, and I can't wait to see how it will turn out if I give it the proper space it needs to rise!

Cracked Wheat Walnut Cider Loaf
Adapted from Macrina Bakery, by Leslie Mackie

3/4 cup cracked wheat
1 cup boiling water
1 1/2 cups walnut halves
1 1/4 cups apple cider
1 1/2 teaspoons dried yeast
2 tablespoons honey
1 cup and 1 tablespoon coarse whole wheat flour
2 1/4 cups King Arthur's white wheat flour
2 teaspoons kosher salt
1/2 cup canola oil

Place the cracked wheat in a small bowl and cover with boiling water. Stir with a wooden spoon to make sure all wheat is moistened. Let sit, uncovered, for 10 minutes while liquid is being absorbed.

Preheat the oven to 325 degrees and spread the walnuts on a rimmed baking sheet to bake in the oven for about 10 minutes. Check the nuts after about 7 minutes though, to be sure they aren't browning too deeply. Remove the nuts form the oven and let cool. Coarsely chop and set aside.

Place apple cider in a medium saucepan and warm over low heat, until just warm to the touch. Pour the warm cider into the bowl of an electric mixer, fitted with the dough hook. Add the yeast and honey and whisk until the yeast is dissolved. Let mixture sit for 5 minutes. Add plumped cracked wheat, 1 cup whole wheat flour, the white wheat flour, kosher salt and canola oil. Mix on low speed for one minute, then increase the speed to medium and beat for 10 minutes. The dough will form a loose ball at the base of the hook. Add the walnuts and beat for an additional 2 minutes. Be sure to watch your mixture toward the end - they have a tendency to "hop" when they are working hard, and might hop right off your countertop!

Transfer the dough to an oiled, medium bowl and cover with plastic wrap. Let proof in a warm room, 70 - 75 degrees for 2 hours. Dough will almost double in size. The dough is done rising when you can poke your finger into it and the indentation stays. Punch down the dough and turn out onto a lightly floured work surface. The dough will be sticky, but don't add more flour. Gently shape the dough into a 12 by 6 inch log, with the long end facing you. Turn the egdes in to meet in the middle, then start rolling the dough away from you into a loaf, and place the loaf in a 9 x 5 x 4 inch oiled loaf pan. Cover with plastic wrap and let proof at room temperature about an hour, or until the loaf rises slightly above the pan.

While the loaf is proofing, preheat the oven to 385 degrees. Remove the plastic from the loaf and dust with the remaining tablespoon of whole wheat flour. Place the pan on the center rack of the oven and bake for approximately 50 minutes. The finished loaf will be medium brown on top. Let the loaf cool in the pan for 30 minutes on a wire rack, then run a sharp knife around the edges of the pan to invert the bread onto the rack to cool completely.

Makes One Loaf

Sunday, October 1

Buckwheat Cake with Cider Poached Apples


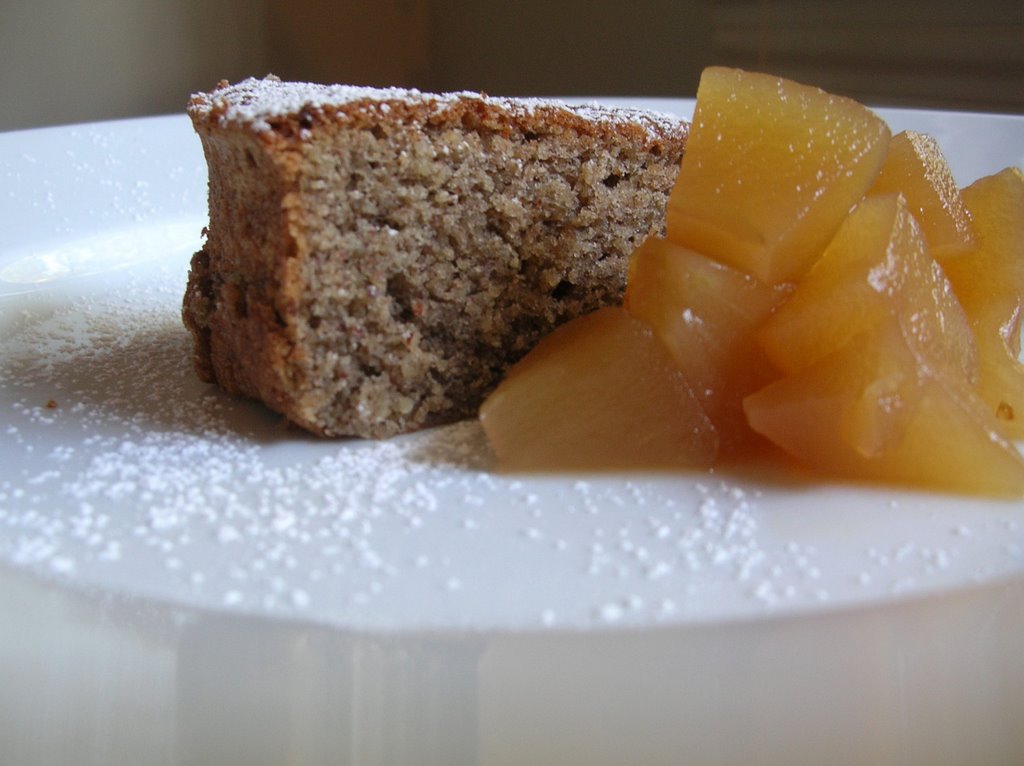
This is the perfect fall cake. The color of the buckwheat-flecked cake, and the shiny and jewel-like apples are both beautiful and delicious. The cake is moist and rich, with butter, almonds, and egg yolks, and just a touch of buckwheat flour to hold it together, then lightened up with the addition of egg whites, beaten with sugar until they look like fluffy meringue.

The apples are poached in a mixture of cider and a few simple spices, which smell heavenly while they are soaking up the juice that will turn them almost transparent, and flavor them with subtle notes of clove and cinnamon. I love desserts which provide texture or contrast, and this one does just that. I couldn't decide which I liked better; taking a bite of cake, followed by a bit of apple, or if I preferred to combine the two in one bite. You'll have to make that choice yourself.

The cake would also be incredible with any number of other fruits or fruit syrups. Blood oranges, plums, and apricots come to mind. And this recipe once again comes from the incredible David Lebovitz, whose desserts are perfection in my book.

Buckwheat Cake with Cider Poached Apples
From Ripe for Dessert, by David Lebovitz

For the Buckwheat Cake:
1 ½ cups sliced almonds
½ cup buckwheat flour
1 tsp baking powder
12 Tbsps unsalted butter, at room temperature
½ cup sugar
6 Tbsp sugar
1 tsp vanilla
4 large eggs, room temperature, separated
¼ tsp salt
¼ tsp cream of tarter, (optional)

For the Apples:
3 cups apple cider or unsweetened apple juice
½ cup sugar
1 stick cinnamon
5 whole cloves
2 - 3 firm apples (Granny Smith or Golden Delicious)
powdered sugar, for dusting

Position a rack in the center of the oven and preheat the oven to 350 degrees. Butter a 9 by 2-inch round cake pan and line the bottom with parchment paper.

To make the buckwheat cake: In a food processor, pulse the almonds with the buckwheat flour and baking powder until the almonds are finely ground.

In the bowl of an electric mixer, or by hand, beat together the butter and 1/2 cup sugar until very light and fluffy, 3-5 minutes if using a mixer. Beat in the vanilla and the egg yolks one at a time, scraping the sides of the bowl as necessary.

In a separate glass or metal bowl, whip the egg whites until they become frothy. Add the salt and the cream of tartar, if using, and continue to whip until the whites begin to hold their shape. Gradually whip in the 6 tablespoons of sugar and keep whipping until the whites form soft, shiny peaks.

Blend the almond and buckwheat mixture into the creamed butter and egg yolk mixture with a rubber spatula. Stir about a third of the beaten egg whites into the batter. It will be thick, but this will lighten it up. Then carefully fold in the remaining egg whites until just incorporated. Don't overfold!

Transfer the batter to the prepared cake pan, smooth the top and bake for 45 minutes, until a toothpick inserted in the middle comes out clean. Cool on a wire rack.

To poach the apples: Warm the cider, sugar and spices in a medium saucepan. Peel the apples with a vegetable peeler and use a 1/2 inch melon baller to make the apple balls.

Drop the apple balls into the cider mixture and simmer gently for 10 minutes, or until tender.

Notes:
The apples definitely take longer than 10 minutes - I probably cooked mine for 40 and then reduced the liquid even further. I didn't have a melon baller, so I just made large chunks.

Thursday, September 28

Moroccan Braised Chicken


I've become a huge fan of chicken legs lately. They aren't dry and
boring like some poultry cuts I know (ehem, chicken breast), they are
cheap enough to justify spending those dollars you save elsewhere
(like the wine aisle). They make for a handsome presentation, and
they work wonderfully in braises.

Braising is something I've been doing a lot lately; maybe because of
the change in seasons, or my new book on braising ,or maybe just
because it works so beautifully, and is so easy.

I tore this recipe out of Everyday Food, that
pint-sized magazine which the grande dame of domesticity publishes.
This is a magazine which I've been suspicious of in the past. The
recipes always appear to be too simplistic. I can appreciate cutting
a few corners for the sake of a quick weeknight meal, but microwaving
a beef stew? A pea soup recipe with 4 ingredients? I have my doubts
about these things.

Despite my snobbery, I thought this recipe look promising - it was
short on ingredients, but you could tell it would be big on
flava'. The chicken legs were braised with onion, prunes, and
a trio of spices - tumeric, ginger and cinnamon. I took the liberty
of adding some cayenne, some honey, and some cilantro to the braising
mixture, and used chicken broth instead of water. The chicken is
served alongside roasted carrots, dressed in lemon, olive oil, salt
and fresh ground black pepper, and all this is set atop a bed of
couscous, to which I added olive oil, lemon juice, cilantro. If
you're one of those people who has a thing against fruit and meat
sharing a plate, then perhaps you could add some almonds, which would
have been a great idea anyways, but as it was, this was an
outstanding weeknight meal.

Moroccan Braised Chicken
Adapted from Martha Stewart's Everyday Food

For Chicken:
2 Chicken Legs, trimmed of excess fat
2 Tbsp olive oil
1/2 yellow or sweet onion, sliced to a medium thickness
Coarse Salt and Ground Pepper
1/4 tsp tumeric
1/4 tsp ground ginger
1/8 tsp ground cinnamon
Pinch of cayenne
10 pitted prunes
1-2 Tbsp honey
1/2 cup cilantro stems and leaves, washed well
1 1/2 - 2 cups chicken broth
Toasted sliced almonds, (optional)

For Carrots
1 bunch carrots, peeled and cut on the bias into large chunks
1-2 Tbsp olive oil (a good drizzle)
Course salt and fresh ground pepper
1/2 lemon

For Couscous
1 cup couscous
1 3/4 cups water
1/4 cup chopped cilantro leaves
1-2 Tbsp olive oil
Course salt and fresh ground pepper
1/2 lemon

Directions
Preheat your oven to 425 degrees. Toss the carrots with the olive
oil, a few squeezes of lemon, and season with salt and pepper. Place
the carrots on a rimmed baking sheet and place in the oven to roast
until cooked through and deeply browned, adjusting the heat if
necessary. This will take anywhere from 20 - 40 minutes depending on
your carrots. Keep an eye on them though - and turn the oven down if
they are browning too quickly. When the carrots are done, toss them
with additional lemon juice.

Heat the olive oil in a heavy skillet over medium to medium-high
heat. Season the chicken with salt and pepper and add to the hot pan
to brown both sides until they are crisp, and golden brown. Set the
chicken aside on a plate, and pour out all but enough oil and
drippings to keep the bottom of the pan coated with fat. Turn down
the heat and add the onions, seasoning with salt and pepper. Saute a
few minutes, then add the spices, stirring to coat, and release their
flavor. Place the chicken legs back in the pan, on top of the
onions, and add the broth, prunes, honey and cilantro. Bring to a
boil, then turn down the heat to low, cover, and simmer gently.

Meanwhile, make the couscous. Place the couscous, olive oil, lemon
juice, and cilantro together in a medium bowl. Season with salt and
pepper. Bring the water to a boil and pour over the couscous. Cover
with plastic wrap to steam.

The chicken is done when it's cooked through - 20 minutes or more,
depending on the thickness. To serve, place a mound of couscous in
the bottom of a bowl (you want something to catch those juices!),
place a chicken leg on each, and arrange the carrots, and prunes &
onions from the sauce around the chicken. (I discarded the cilantro
stems). Taste the sauce - if it's weak, turn up the heat on your
stove and reduce the sauce until thickend slightly. Pour the sauce
around the chicken, and garnish with additional cilantro leaves, or
almonds if desired.

Serves 2

Monday, September 25

A Cookie is Never Just a Cookie


Is it? With a tall glass of cool milk, it's a comforting end to a long day. It's the sweetness you crave at 3:00 in the afternoon, when it seems like an eternity since lunch. And if you're a baker, it's the perfect thing to help you satisfy your need to bake something without getting out too many pots and pans, or making a trip to the store.

Some people like them chewy, others crispy, some with nuts, some without. Or what about the addition of oats, shaved chocolate, dried cherries, or cocoa nibs? Some people don't give a gosh darn - they just want a hit of sugar, and don't mind how it's delivered. I like to say that I've never met a cookie I didn't like, but like most people, I do have my 'druthers'.

I almost never make the same chocolate chip cookie recipe twice - almost never. Usually I can't resist the idea of stumbling across another great cookie recipe, and I hope that somewhere along the way, I will learn so much about what makes a cookie turn out the way it does, that I can develop my own perfect cookie. But certain cookies require loyalty, like this one, or my mom's chocolate chocolate chip cookies, which are absurdly impossible to stop eating. More on these later.

My ideal cookie though is crispy on the edges, with an almost caramel-edge, and chewy in the middle. They have to be absolutely loaded with chocolate chips - no chip-free bites allowed. I don't want to find myself searching through the cookie bag, turning each over to see which one looks like it has recieved the greatest proportion of chips - I don't want my cookie to put me that position. Don't make me look desperate, cookie. Give me some toasty walnuts, and on occasion, some oats, dried fruits, or almond extract to spice things up, too. But for the most part, it all comes down to the chips and the consistency of the dough.

This cookie, however, was made for my loving hubby, who likes to end each and every day with something sweet, followed by a large glass of milk, which is always consumed in one amazing gulp, which is in turn followed by an immediate and mandatory horizontal position. This sweet tooth likes his cookies on the soft side, verging on underbaked. I left a few cookies in the oven longer though, so I could satisfy my craving as well.

Oatmeal Chocolate Chip Cookies
Adapted from this recipe, which was adapted from this one.

1 cup all-purpose flour
1 cup whole-wheat pastry flour flour
½ tsp baking soda
½ tsp salt
¾ cup unsalted butter, melted and slightly cooled
1 cup packed brown sugar
¼ cup granulated sugar
½ Tbsp vanilla extract
½ Tbsp hazelnut extract (or vanilla, if you don't have it)
1 egg
1 egg yolk
1 ½ cups best-quality semi-sweet chocolate chips
1 ½ cups rolled oats zizzed in a food processor for a few seconds

Preheat your oven to 325 degrees. Line 2 cookie sheets with parchment paper or silicone baking mats .

Sift together both flours, baking soda, and salt; set aside. In a medium bowl, cream together the melted butter and brown and granulated sugars until well blended. Beat in the vanilla, hazelnut, egg, and egg yolk, mixing until light and creamy. Mix in the sifted ingredients, and mix until well-blended. Using a wooden spoon or spatula, stir in the chocolate chips and oats by hand. Chill dough in the refrigerator for 30 minutes to one hour. Scoop and press dough into ¼-cup measuring scoops, and plunk the mounds onto the prepared cookie sheets. Give the cookies a few inches to spread out as they bake.

Bake cookies for 13 to 20 minutes, or until the edges are lightly browned. Be sure to check on your cookies around 13 minutes, because mine didn't take much longer than this. Cool on baking sheets for a few minutes before transferring to wire racks to cook completely.

Enjoy!

Saturday, September 23

Wild Rice and Friends

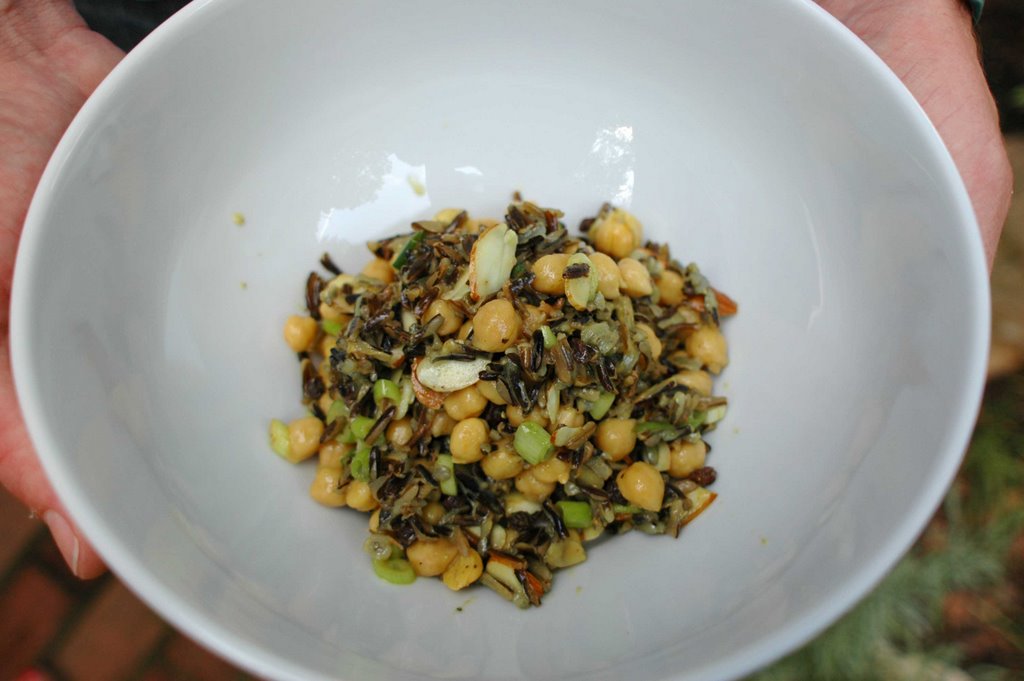
I first made this salad out of Food and Wine 3 years ago, and I have faithfully returned to it every 6 months or so since then. Probably because it uses some of my very favorite ingredients - wild rice, chickpeas, raisins, sliced almonds, and it introduced me to this wonderful curry-flavored dressing, sweetened with honey, and given a little kick by a generous pinch of cayenne.


I still remember the article this recipe came from too - it was about a couple that had moved to Texas to escape city life, and all the recipes in the article looked wonderful. There were two other grain salad recipes, that are still on my to-try list.

Wild rice is such a treat - it's chewy and light, with an earthy taste that is a perfect base for all sorts of wonderful additions - dried fruits, nuts and seeds, smoked meats, and flavorful dressings. This particular salad fits in beautifully at the fall table, with it's muted colors and warm flavors. The original recipe calls for ham, but offers sliced almonds as an alternative, which I always use, because the salad stays longer in the fridge that way, and I always have some sliced almonds laying around.


I had this salad for lunch all week long, which my Butternut Squash Soup, and they made quite a pair for the first chilly week of fall, here in North Carolina. This salad is open for all sorts of happy experimentation - cranberries, whole smoked almonds, or even some roasted shallots... really, you could do anything with it your little heart desires. The dressing is versatile and delicious, so ladies and gents, get out your apron and get busy.

Wild Rice Salad with Chickpeas and Almonds
Food and Wine, June 2003

1 ½ cups wild rice (10 ounces)
Kosher salt
2 ½ tablespoons fresh lemon juice
2 tablespoons red wine vinegar
2 tablespoons Dijon mustard
1 tablespoon honey
1 teaspoon curry powder
1 teaspoon ground cumin
Pinch of cayenne pepper
¼ cup extra-virgin olive oil
1 19-ounce can chickpeas, drained and rinsed (or 1 1/2 cups cooked chickpeas)
¼ lb. smoked ham, diced (optional)
1 large handful sliced almonds
4 small scallions, white and light green parts, thinly sliced
¼ cup golden raisins (I used currants this time around)
Freshly ground pepper
Hot sauce (Cholula - is there any other brand worth using?)

Fill a large saucepan three-quarters full of water and bring to a boil. Add the wild rice and 1 tablespoon of salt and simmer over moderate heat until the rice is tender and most of the grains have just split, 50 minutes. Drain and rinse the rice under cold water, then drain again.

Meanwhile, in a large bowl, whisk the lemon juice, vinegar, mustard, honey, curry powder, cumin and cayenne. Add the olive oil and whisk until combined. Toss in the chickpeas, ham, scallions, raisins and wild rice. Season the salad with salt, pepper and hot sauce, transfer to a bowl and serve.

Serves 6

Tuesday, September 19

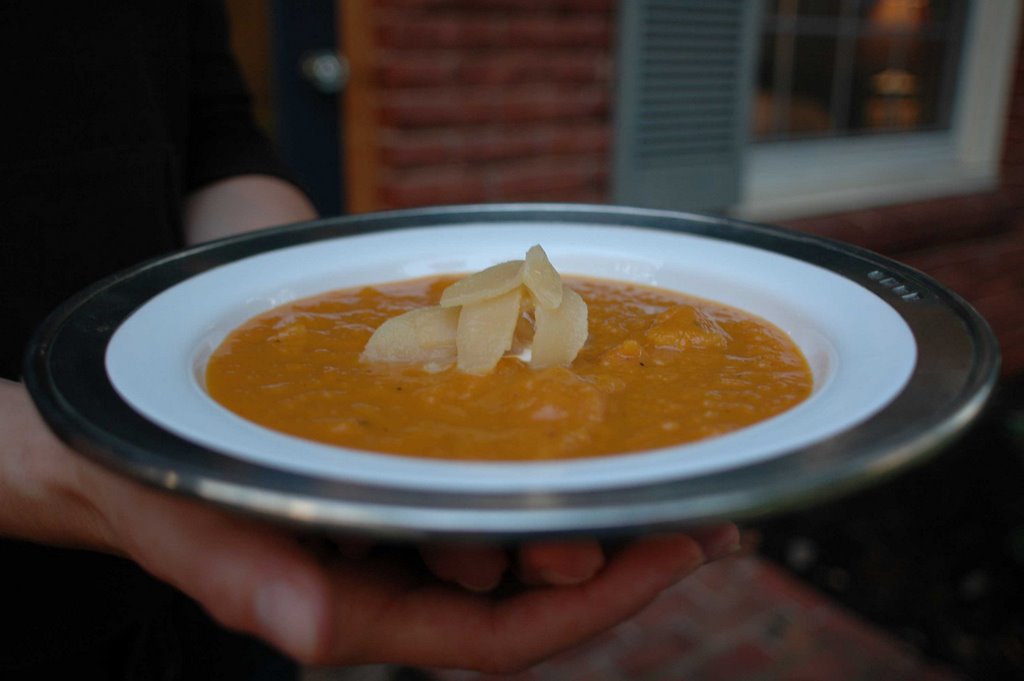
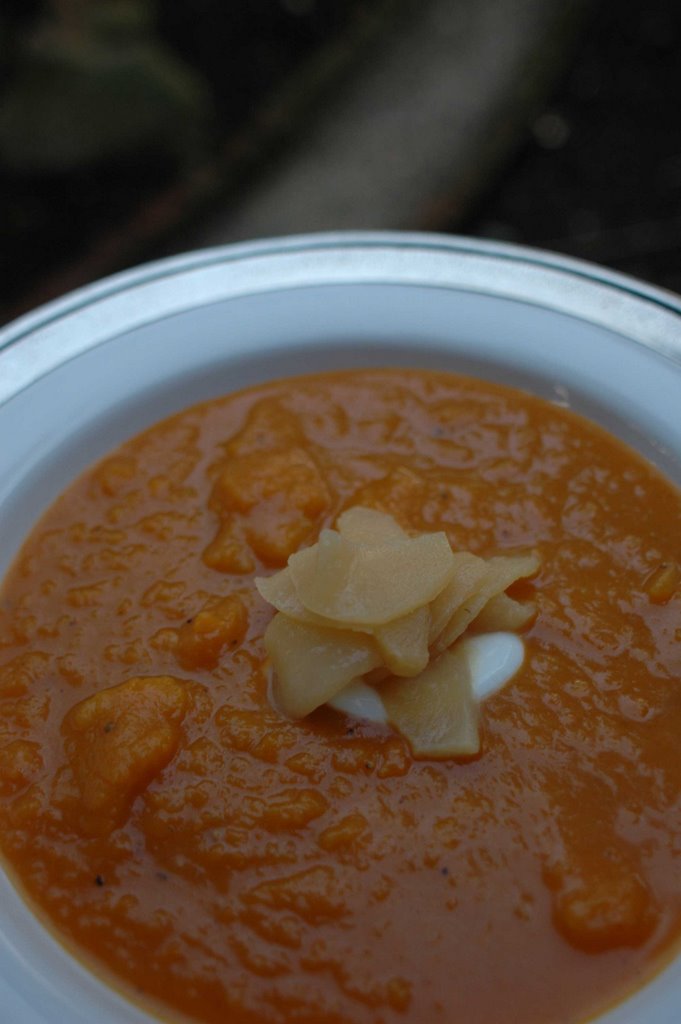
Butternut Squash Soup with Apple Confit


Does that sound delicious, or what? This soup was so easy, and the apple confit pushed it from ho hum, to "oh yum". Okay, that was cheesy, but this soup was great, it was ridiculously simple, and there's very little else to say about it. Make it. You will be so happy you did!

Butternut Squash Soup with Apple Confit
From "Fields of Greens" by Annie Somerville

3 cups Light vegetable or chicken stock
1 Tbsp olive oil
1 Medium Yellow onion, thinly sliced (about 2 cups)
3 Tbsp Calvados (if you don't have Calvados, you could substitute white wine, but the flavor is wonderful, and you'll find a million other uses for it!)
4 lbs Butternut squash, peeled, seeded and cut into large cubes (about 6 cups)
1 Tbsp unsalted butter
2 McIntosh apples or other flavorful, not too tart apples, peeled, cored, and sliced (about 2 1/2 cups)
½ cup Apple Juice
½ cup Creme Fraiche, (I used Greek yogurt)

Heat the olive oil in a soup pot and add the onion, season with salt and pepper, and saute over medium heat until slightly caramelized, about 15 minutes, adding a little stock and scraping with a wooden spoon if they start to stick to the pan. Add 2 Tbsp of the Calvados, and cook for 1-2 minutes, until the pan is almost dry.

Add the squash cubes and about a teaspoon of salt to the onions. Add just enough stock to barely cover the squash (about 2 cups); the squash quickly breaks down and releases its own liquid as it cooks. Cover the pot and cook over medium heat for 20-30 minutes, until the squash is very soft.

Puree the soup in a blender or with a handheld immersion blender, and thin it with stock to reach the desired consistency. Return the soup to the stove and cook over low heat for 30 minutes to further develop the flavors.

While the soup is cooking, make the apple confit. Melt the butter in a medium-size saute pan and add the apples; saute over medium-high heat, stirring to coat them with the butter. When they're heated through, add the remaining Tbsp of Calvados and cook until the pan is almost dry. Add the apple juice, cover the pan, and cook over medium heat for 15-20 minutes, until soft; cook, uncovered, for 8-10 minutes to reduce the liquid. Mash the apples, making sure the confit retains some texture.

Stir half the confit into the soup, saving the rest to stir into each serving. Season the soup with salt and pepper to taste. Add a spoonful of apple confit and a swirl of creme fraiche to each serving.


Notes:
To make a wonderful meal, serve this soup with crusty sourdough bread, nutty, well-aged Gruyere cheese, and a salad of biter greens with toasted walnuts and walnut-oil vinaigrette.

Wednesday, September 13

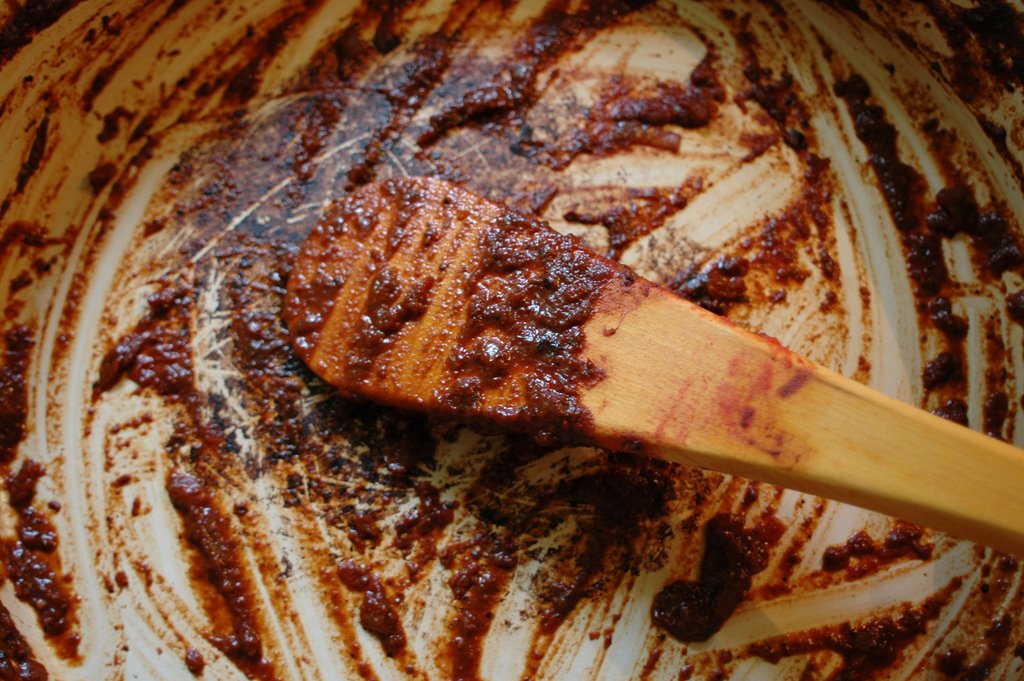
Mole (Moh-lay) on My Mind

As I was contemplating how to approach this post today, I started wondering at the place that mole has in Mexican cooking. It seems interesting that a culture which produces such wonderfully simple food should come up with a sauce which is has a famously long list of ingredients. So, curiosity leading the way, I pulled out my trusty Food Lover's Companion, which gave the following definition of mole:

Mole [moh-lay] From the Nahuatl molli, meaning "concoction", mole is a rich, dark, reddish-brown sauce usually
served with poultry. There are many variations of this spicy Mexican specialty...mole is a smooth, cooked blend of onion, garlic, several varieties of chiles, ground seeds and a small amount of Mexican chocolate...


With some further investigation, I uncovered some debate as to whether or not the Aztecs (thought by many to have made the first mole) would have actually used chocolate, which they considered to be sacred, in such a sauce. Turns out scholarly types don't think so, so the mole we know today is most likely a complex sauce that has developed over time, but has the basis of onion, chiles, and spices, which are all very familiar Mexican ingredients.

I ate my first mole only a short time ago, and it has been one of those foods that grew on me while I wasn't looking. The first time I tried, I said "this is pretty good", but wasn't enamored. I tried it a few other times - still no love. Then suddenly, out of the blue, I was craving mole on a regular basis. I wanted to try and make it at home, but envisioned a long and frustrating day in the kitchen, where at the end, I might find myself wishing I'd just gone to my local burrito shop to fulfill my craving instead.


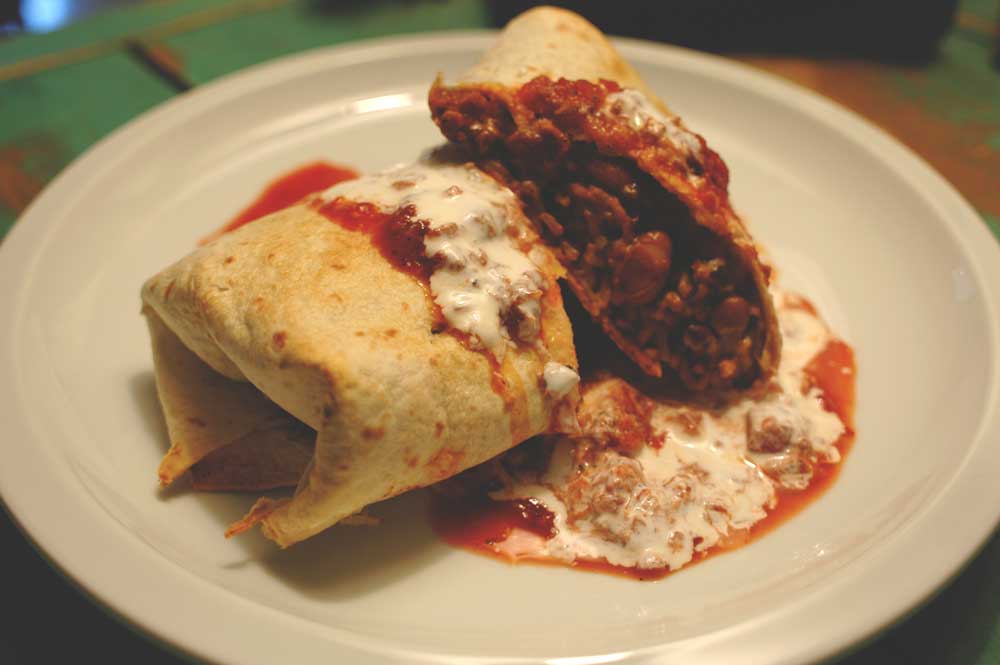
Lucky for me I have Sally Schneider's A New Way to Cook, which offers up a tasty "Revisionist Mole", which is quicker, easier, and healthier than most moles. This may not win any Mexican cookoffs, but it sure makes for a tasty addition to your weekday meal repetoire. This recipe made enough for me to freeze 4 extra servings, which I've used for the burritos I show below, and some outstanding "Fat Bean Tacos", which we topped with sliced radishes, chopped avocado and some fresh cheese. My plans for the remaining sauce in the freezer include a Mole Pork Tenderloin, and another round of bean tacos, which were totally delicious.

Revisionist Mole

6 Dried Ancho chiles
5 Garlic cloves, Unpeeled
1 tsp ground cinnamon
¼ tsp dried basil
¼ tsp dried oregano
¼ tsp cumin seeds
1 ½ cups chicken broth
1 Tbsp balsamic vinegar
1 ½ tsp vegetable oil
2 medium onions, chopped medium fine
1 28 ounce can crushed tomatoes or whole plum tomatoes, (pureed in a blender with their juices, if using fresh)
1 ounce chunk smoked ham, cut into 4 pieces
¾ ounce Mexican chocolate, (or 1 Tbsp unsweetened cocoa powder)
1 - 2 tsp sugar
Kosher salt

With scissors, split open the chiles, and sicard the stems and seeds. Cut the chiles into large flat pieces. In a large heavy skillet, toast the chile strips over moderate heat, turning occasionally to prevent burning, until they begin to darken and smell pungent, about 3 minutes. Transfer to a medium bowl. Cover with about 2 cups boiling water and let soak for 20 minutes, or until soft.

Meanwhile, add the garlic cloves to the skillet and toast for about 15 minutes, turning occasionally, until the skins have blackened in spots and the garlic has softened somewhat. Remove from the heat.

In a blender, combine the garlic, cinnamon, basil, oregano, cumin seeds, chicken broth and vinegar. Drain the ancho chiles and add to the mixture. Blend at high speed for one minute, until smooth.

In a large skillet, combine the oil and onions, cover and cook over low heat until the onions have begun to release some of their liquid, about 5 minutes. Uncover, increase the heat to moderate, and saute the onions until golden brown, about 10 - 15 minutes.

Add the ancho chile mixture and cook, stirring, for 5 minutes. Stir in the tomatoes and ham, partially cover, and simmer until the sauce is very thick, about 25 minutes.

Add the chocolate and simmer until the sauce is very thick and has reduced to about 4 cups, about 10 minutes longer. Discard the ham (which will have given up its flavor) and add the sugar and salt to taste.

The sauce can be refrigerated, covered, for up to 1 week or frozen up to 3 months.


Notes:
This is an easier take on mole, and much less fattening. You can use it to season bean soups, doctor up canned beans, or braise pot roast and chicken. Use it in Fat Beans with Mole (from the book). Toss it with shredded leftover pork or chicken or with shrimp and roll up in hot tortillas. You can also make a marvelous chili by stewing 2 pounds of 1/2 inch chunks of trimmed stewing beef or venison in the sauce until it is very tender, about 1 1/2 hours over low heat. Brown the meat in 2 tsp rendered bacon fat or oil first. Add dark beer, 1/4 cup at a time, to the sauce to replenish the level as it cooks.

Sunday, September 10

A Little Sunday Night Comfort


If you love to cook, Sundays are the most anticipated day of the week. A full day to prep, season, and saute away! I love to plan for the week on Sundays, sometimes preparing soups to eat for the week, or just cleaning out the fridge and making the kitchen sparkle, so that when I get home from work, it's a pleasure to spend time in the kitchen preparing dinner.

As much as I love to cook on Sundays, I also don't like to be stuck in the kitchen all day long, so our Sunday night meals are usually something simple and comforting, something to help us finish off the week in a good state of mind, preferrably something that goes well with some red wine (there aren't many things that don't go well with red wine if you're a dedicated daily indulger).

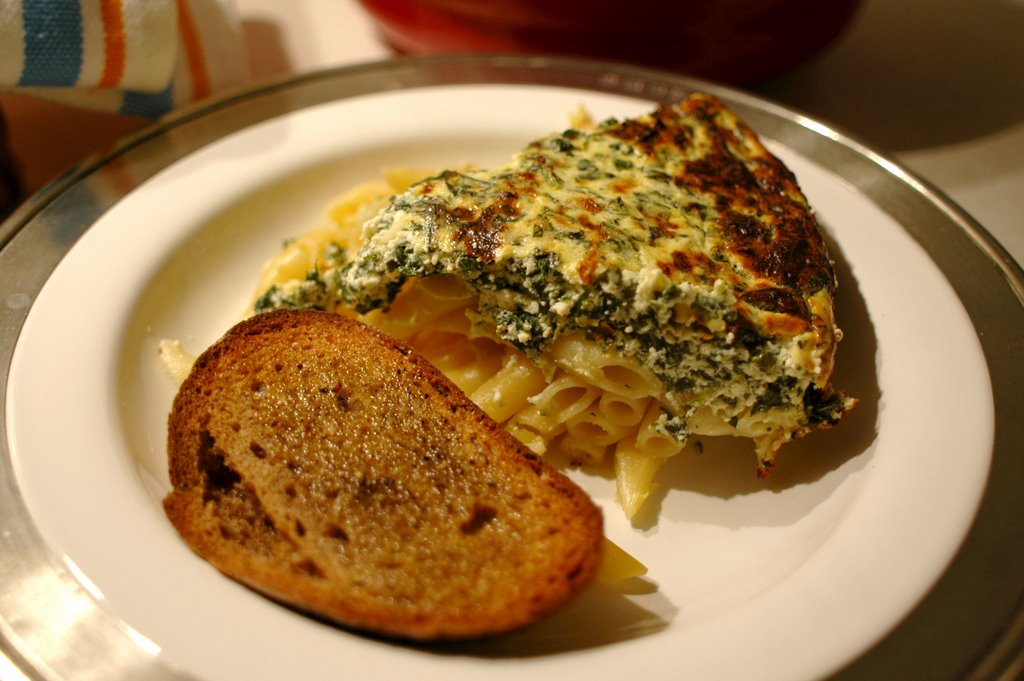
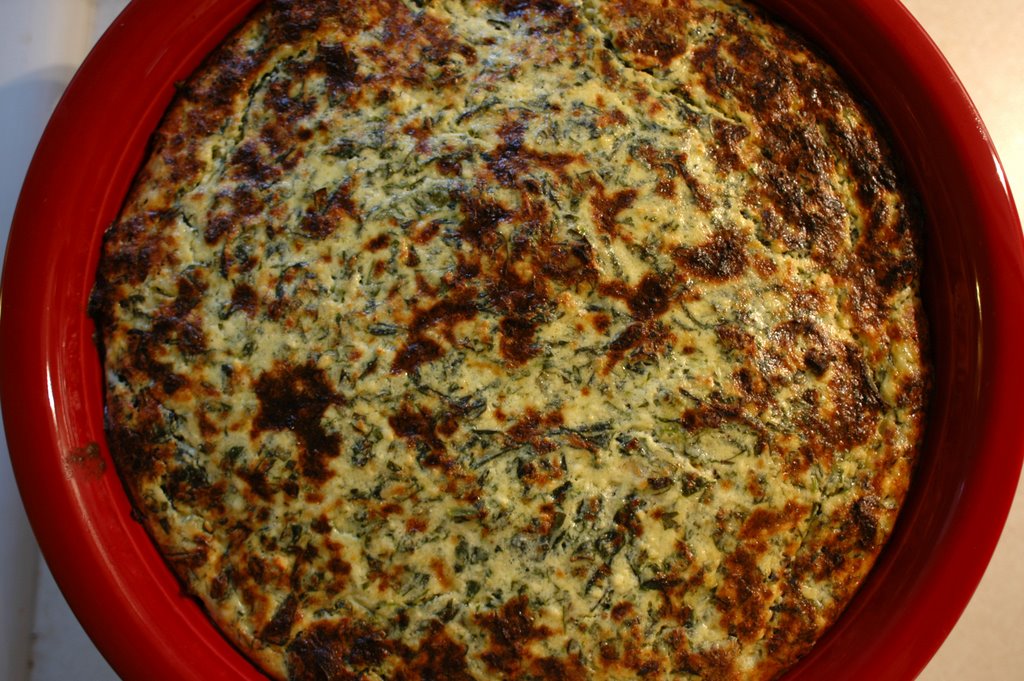
I have had Donna Hay's Book, Off the Shelf: Cooking From the Pantry for about 6 years now, and never had I made one thing from it until tonight. Why? I really couldn't say, because I've flipped through it a million times, the photos are so enticing, and everything is dead simple. When I pondered what to do with my leftover ricotta (why is there always this dilemma of leftover ricotta? I actually like it enough to eat off a spoon, but usually try to refrain from doing so), I decided to finally give old Donna a try. This Ricotta Spinach was simple and pretty satisfying, but I altered the recipe quite a bit, and found that I needed the full amount of pasta called for in the recipe, but only half the ricotta spinach topping, which caused me to have to go back and boil another pot of water for pasta, since it was obvious that I had WAY too much topping for half a box of pasta, even though I had halved the recipe for it.

This is a great base recipe, and uses some ingredients that I'm usually looking to use up after days of sitting in the fridge with no purpose ahead of them. I will certainly use this as a basis for future baked pasta dishes, but I will probably never make it exactly the same. I think a layer of roasted cherry tomatoes would have done wonders for the overall impact of the dish, visually and because it would provide an extra layer of texture and brightness that was missing here. As for Donna's book, I'm not sure I could make a judgement just yet... I'll have to do some more testing and report back.

Ricotta Spinach Pasta Bake
Based loosely on a Donna Hay recipe

5 fl. oz sour cream
3/4 lb ricotta cheese
2 eggs, beaten
1/2 cup parmesan or pecorino romano cheese, grated
1 bunch Spinach, stemmed and washed thoroughly
1 clove garlic, minced fine, and smashed to a paste with your knife
1 handful Italian parsley, chopped
1 handful basil leaves, chopped
Pinch of red pepper flakes
Pinch of nutmeg
Salt and Pepper
1 pound penne or rigatoni

Preheat the oven to 350 degrees. Put a large pot of water on to boil ( you will use this for blanching the spinach and cooking the pasta. Prepare a oven safe baking dish, about the size of a large pie dish, or deep casserole; whatever you choose, just keep in mind that thick you want your layer of noodles - probably about 3 inches or so.

In a medium bowl, combine the sour cream, ricotta, eggs and parmesan cheese. Season with a pinch of nutmeg, red pepper flakes, salt and pepper, and set aside.

When the water reaches a boil, blanch your spinach and remove to a colandar to drain and cool. Bring the water to a boil again and cook the pasta to al dente. When the spinach is cool enough to handle, squeeze well to drain, and move to your cutting board to chop. Add the spinach, garlic, parsley, and basil to the ricotta mixture and stir to combine.

When the pasta is finished, toss with a little olive oil and place in your baking dish, pressing the noodles into the dish to remove air pockets. Spoon the ricotta mixture over top the noodles and smooth the top.
Bake for 35 minutes, or until the top is golden brown, and the top is set. If necessary, turn up the oven at the end to achieve a more golden crust.

Serves 6

Sunday, September 3

Inspiration for a New Season

I adore fall, and the change that it brings. The cooler air seems to bring with it a sense of renewal that I find more intense than the spring. After a long, hot summer, I cannot wait to pull out my sweaters, trade my iced coffees for warm lattes, and to treat myself to all the wonderful foods of fall. Warm stews and soups, roasted squash and parsnips, pies and delicious warm breakfasts of oatmeal are all the ultimate comfort foods to me. I feel inspired and reflective in the fall. The slower pace and softer light offer a beautiful new perspective.


We were lucky enough to get a little cooler weather right in time for the beginning of September, and although I know we have more hot weather ahead of us here in the South, my mind and body are already set in the new season, and so I've begun cruising through my cookbooks and magazines, looking for my inspiration for these next few months in the kitchen. I pulled out this recipe from Gourmet last month, and the soup is a perfect transition from summer to fall. It uses the last of the tomatoes reddened in the summer sun, or, if you're like me and you already exhausted your supply, go ahead and use canned tomatoes. I can guarantee the results are just as tasty.

This soup is satisfying without being heavy. With a salad or a slice of bread, it would make a great lunch or light dinner.

Provencal Tomato Soup with Rice

2 lb tomatoes (or substitute 1 28-oz, and 1 14-oz can of whole, peeled tomatoes, de-seeded as instructed below)
2 medium onions, halved lengthwise, then thinly sliced crosswise (2 cups)
1 medium carrot, coarsely grated
1 celery rib, finely chopped
4 large garlic cloves, finely chopped
3 (3- by 1-inch) strips fresh orange zest, finely chopped
1 teaspoon finely chopped fresh thyme
Scant 1/4 teaspoon dried hot red-pepper flakes
1/4 teaspoon fennel seeds
1 Turkish bay leaf or 1/4 California
3 tablespoons extra-virgin olive oil
2 tablespoons tomato paste
3 cups water
1 3/4 cups reduced-sodium chicken broth (14 fl oz)
3/4 teaspoon salt
1/4 teaspoon black pepper
Pinch crumbled saffron threads
1 to 2 teaspoons sugar
1/4 cup long-grain white rice
2 tablespoons chopped fresh flat-leaf parsley
1/4 cup chopped fresh basil


Cut a shallow X in bottom of each tomato with a sharp paring knife. Blanch tomatoes in batches of 2 or 3 in a 5- to 6-quart pot of boiling water 10 seconds, transferring with a slotted spoon to a bowl of ice and cold water to stop cooking.

Peel tomatoes, then halve crosswise. Squeeze halves gently, cut sides down, over a sieve set over a bowl to extract seeds and juices, then press on seeds and discard them. Reserve juice and tomatoes.

Cook onions, carrot, celery, garlic, zest, thyme, red-pepper flakes, fennel seeds, and bay leaf in oil in a 2 1/2- to 3-quart heavy saucepan over moderate heat, stirring occasionally, until vegetables are softened, about 5 minutes.

Add tomatoes with reserved juice, tomato paste, water, chicken broth, salt, pepper, saffron, and 1 teaspoon sugar, then simmer, uncovered, stirring and breaking up tomatoes with a spoon occasionally, 20 minutes. Stir in rice and simmer, uncovered, until rice is tender, 10 to 20 minutes. Discard bay leaf and stir in parsley, basil, and sugar and salt to taste.

Makes 4 to 6 servings.

Friday, September 1

A Muffin with Character


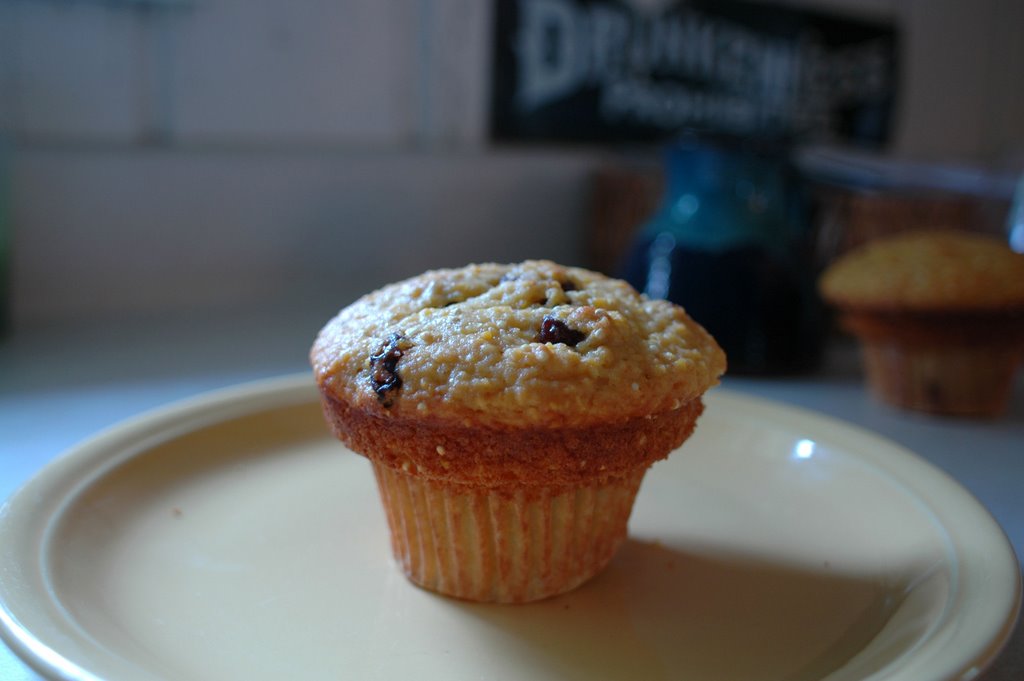
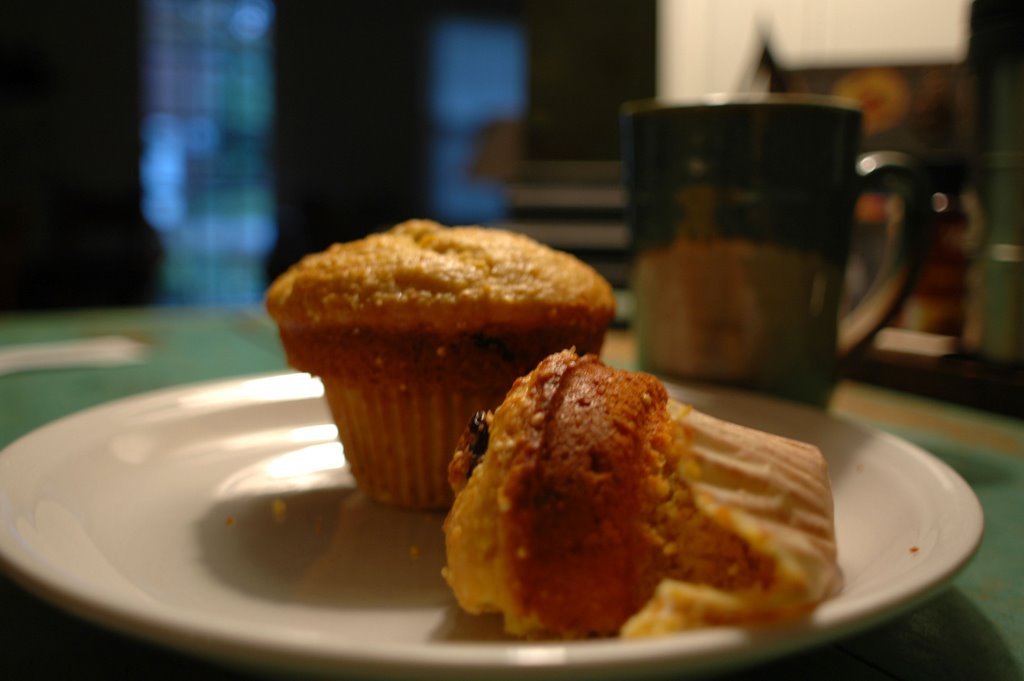
It's crunchy with millet and cornmeal, it's scented with orange, and it's full of chewy dried cranberries. Muffin, I think I love you.

This recipe is from my favorite cookbook In The Sweet Kitchen. I highly suggest toasting the muffins in the oven if you can't get to them warm out of the oven.

Orange, Dried Cranberry and Cornmeal Muffins with Millet

(Author's Note: I probably make this recipe, exactly as it is here, more often than any other. These muffins became a hit several years ago when my duties as pastry chef at Avalon included baking breakfast pastries for the sister restaurant, Zocalo. After weeks of the entire batch of these disappearing into the hands of the cooks and wait staff before the customers even got to them, the chef insisted everyone eat breakfast at home! They are a great combination of flavors and textures. Cornmeal adds a nutty, toasted flavor; plumped dried cranberries give the muffins a chewy, pleasantly tangy taste; millet adds a subtle sweetness and crunch; and freshly grated orange zest and orange juice lace it all together with a fresh, bright taste. As far as I’m concerned, the perfect muffin!

2 2/3 cups all-purpose flour (I used half whole-wheat pastry flour)
4 teaspoons baking powder
1 teaspoon salt
1/2 cup granulated sugar
2/3 cups yellow cornmeal, preferably stone-ground
1/4 cup millet
2 large eggs
1 teaspoon finely grated orange zest
1 1/2 cups orange juice
2/3 cup unsalted butter, melted and cooled
1 cup dried cranberries, plumped in warm water for 30 minutes if necessary

Preheat the oven to 350 degrees F. Grease 6 large (1-cup) or 12 regular-sized (1/2 cup) muffin tins, including rims, or line with paper liners. I find a non-stick cooking spray works very well. Sift the flour, baking powder and salt together into a large bowl. Add the sugar, cornmeal and millet and stir together with a fork or whisk to blend.

In a separate bowl, lightly whisk the eggs, then blend in the orange zest and juice and melted butter. Add the egg mixture all at once to the dry ingredients, mixing with a rubber spatula or a wooden spoon just until the dry ingredients are moistened. While there are still a few floury patches, gently fold in the cranberries.

Spoon the batter into prepared tins, filling each cup to the rim, and place the try on a baking sheet, to catch any drips. Bake 20 to 25 minutes for regular-sized muffins, 30 to 35 minutes for large ones, or until the tops are golden brown in places, spring back when lightly touched and a skewer inserted in the center comes out clean.

Transfer the tray to a rack and cool 5 minutes, then turn the muffins out onto the rack. These are fabulous served warm with a little sweet butter, or may be cooled completely, then wrapped individually and stored at room temperature for up to two days. If they become slightly hard, wrap in foil and warm in a low oven before serving. These muffins also freeze beautifully, for up to 2 months.

Source: In the Sweet Kitchen, Regan Daley
Makes: 6 large or 12 regular muffins

Vermont Farm Table