Thursday, August 31

Mediteranean Bean Panzanella


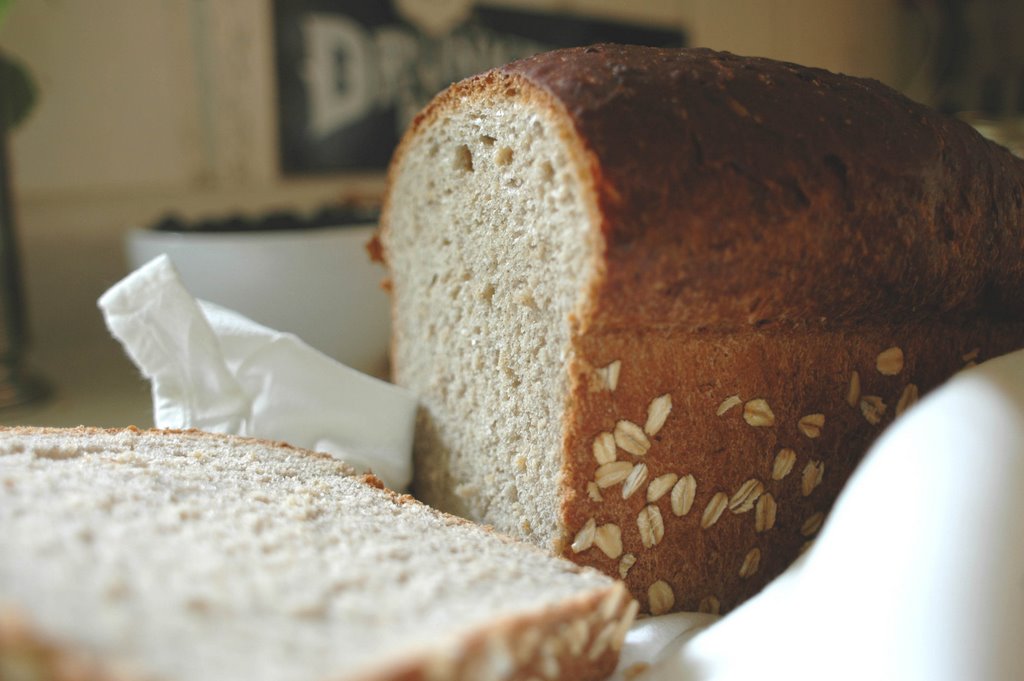
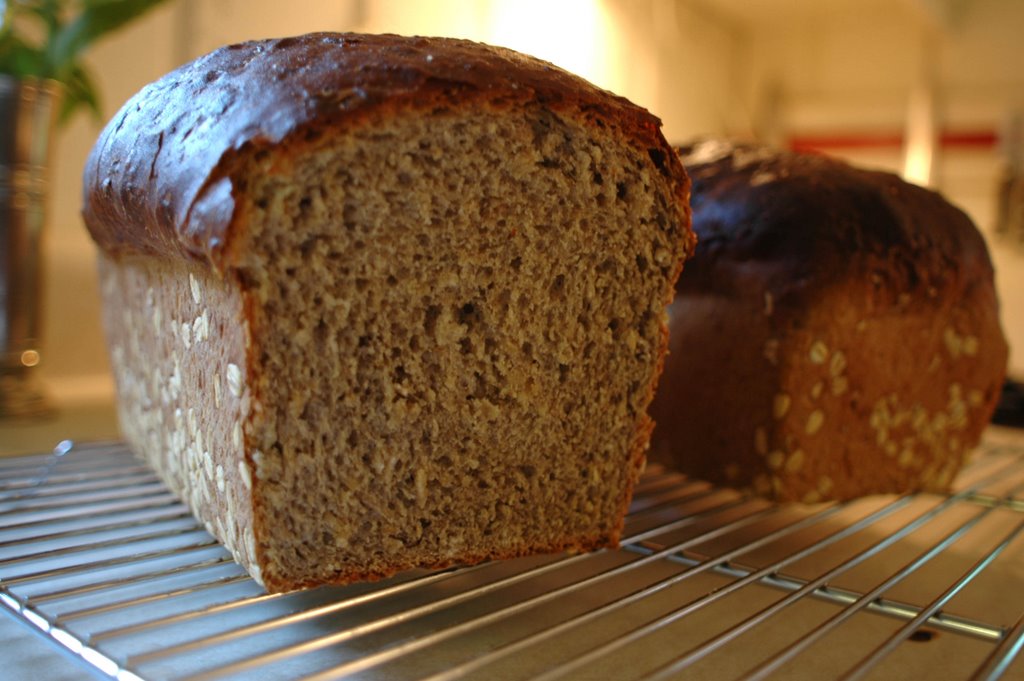
Dustin and I have grown terribly fond of panzanellas. So easy, so versatile, and healthy to boot. It's the perfect summer meal, when you get home from work and would rather sit outside, sipping a beer than throw something together for dinner. And, since it's just the two of us, and I have a weakness for purchasing delicious artisinal bread, which we can never finish, we always have leftover bread laying around. And people, if I made bread pudding everytime we had leftover bread, my pants would no longer fit.

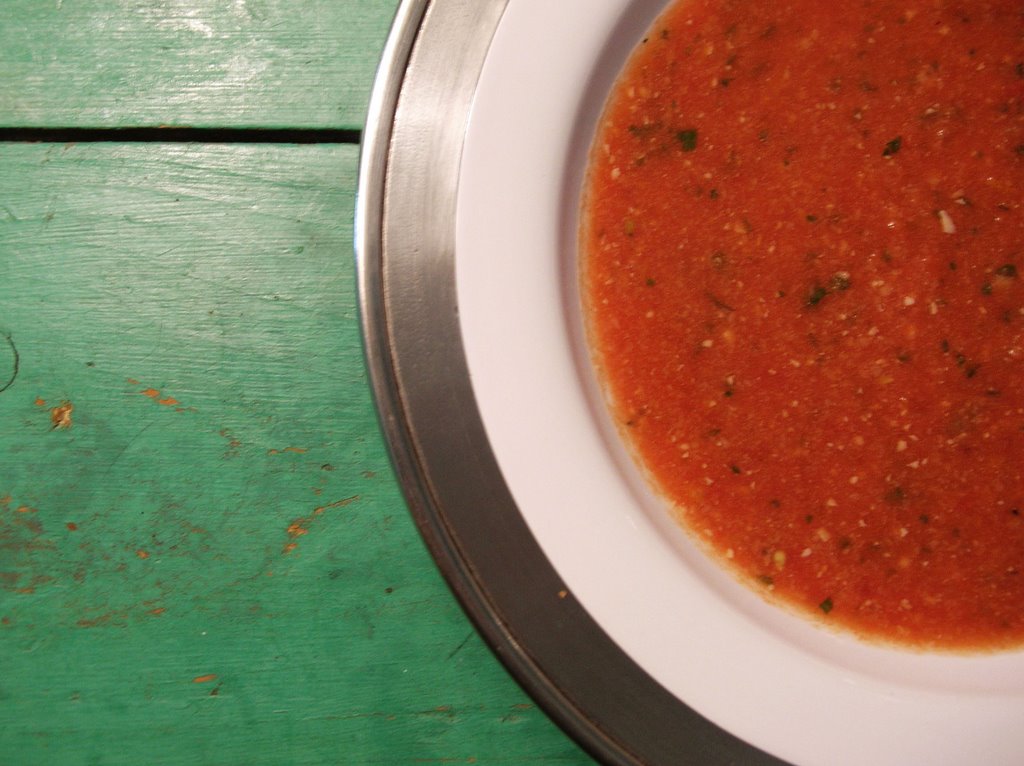
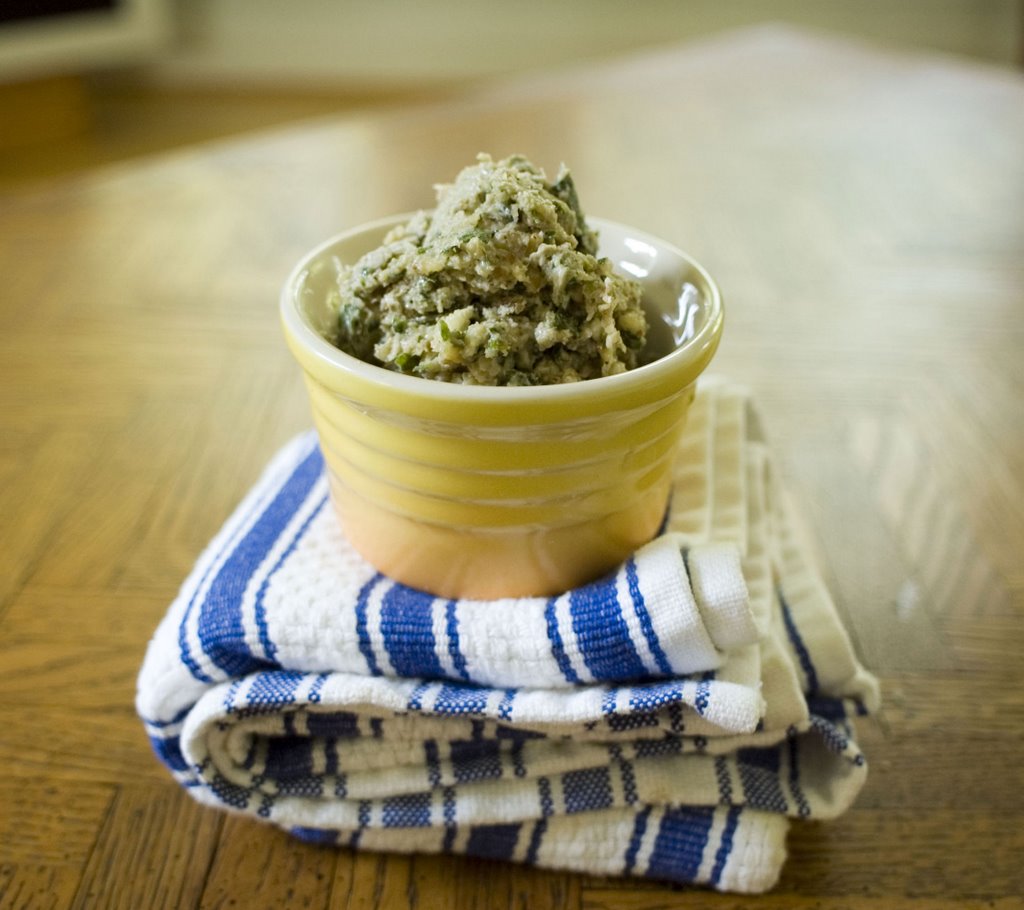
The first time I made panzanella was actually only a few months ago. I tore out a recipe card from Martha Stewart for a Meditteranean Panzanella, with green beans, olives, red onion, and feta. From that point on we were hooked. I've made a few panzanellas since then, but the one that we had for dinner last night was by far the best yet. Having some leftover flageolet beans, and the last of our tomatoes from the garden, which I roasted in the oven with thyme and garlic, dinner was practically made before I even started.

Hopefully you'll make this, or use it as inspiration to create your own panzanella. Although it's usually considered a summer dish, I've already been envisioning fall versions, with roasted squash, or some roasted peppers, or maybe even a variation with some steak and blue cheese. If you love beans though, absolutely give this a try. I totally adore beans, and this was meal perfection for me.

Mediteranean Bean Panzanella
Serves 2

For Dressing
2 Tbsp good-quality olive oil
2 Tbsp red wine vinegar
1 tsp Dijon mustard
Salt and Fresh Ground Pepper

For Salad
1 1/2 cups beans, preferably a soft-textured white bean
1/2 cup roasted tomatoes
1/4 red onion, thinly sliced
8 oil-cured black olives, chopped
Handful of flat-leaf parsley, chopped
Feta or goat cheese for garnish, optional

2 Thick slices good-quality bread, cut 1-inch thick

Preheat your oven to broil. In a large bowl, combine the ingredients for the dressing, mixing well to emulsify. Toss the onion, and olives in the bowl, and let sit while you prepare the rest of the salad.

Warm the beans and roasted tomatoes in a small saucepan (drain and rinse if using canned; add a splash of olive oil or chicken broth to moisten) over medium-low heat. In the meantime, place your bread slices under the broiler, and toast evenly to a golden brown on both sides. Remove from the oven.

Add the beans and tomatoes to the bowl with the dressing, and toss gently to combine. Cut the bread into 1-inch cubes, and add to the salad, along with the chopped parsley. Toss gently again, to thoroughly mix ingredients and moisten the bread with the dressing.

Divide the salad among 2 bowls and top with cheese if desired.

Five Things


Oh Joy of Joys! It's so much fun to discover the world of blogging. You spend weeks, months, maybe even a year or two silently learning the ropes, following link after link until you realize that there's an entire world out there full of people who, like you, spend obscene amounts of time thinking about food & cooking, and then turn around and share their stories and lives with a world of friends, who happen to live on opposite sides of the world, who they may never meet, who they have found through their love of food.

It's been fun to stumble into this hobby, and find an outlet for my obsession, and even more fun to "meet" so many of the bloggers who stop by my site to say hello, or who I've reached out to through their blogs. There are so many talented people out there, it amazes me and inspires me every day.

Anyways, Natalia, of From Our Kitchen was one of the first fellow bloggers to stop by, give me advice, and encourage me in my new blogging adventure. So I was delighted this morning that she had tagged me to participate in the blogging event "5 Things to Eat Before You Die", started by Melissa, from the gorgeous The Traveler's Lunchbox.

Obviously this is a hard exercise for someone who loves food, but therein lies the fun! My list leans more toward foods that I could not live without than it does toward the exotic. So here goes....

1. Poached Eggs with extra-runny yolks. I can seriously think of nothing else that I eat that gives me quite as much pleasure as runny eggs, as long as I have plenty of bread to soak up that golden goodness.

2. Blueberry Pie, eaten at room temperature, for breakfast. Blueberries are magical when they bake down into a deep sticky sweetness. You can really taste most things a lot better at lukewarm or room temperature, and I love to have my pie with coffee, in the morning, when I can cut a significantly larger piece than I would after eating dinner.

3. "Bolo", made by my husband. Dustin makes the most outrageous Bolognese. It's an all day affair, and he's never makes it the same way twice, but it's always unbelievably comforting and delicious. I look forward to a huge batch every fall, which we freeze and feast on until (sniffle) it's all gone.

4. Thanksgiving leftovers. I look forward to leftovers more than I do the actual Thanksgiving feast. I love it when my mom pulls out the soft potato bread, layers on the leftover turkey meat, and tops it all off with tons of gravy, so that the bread practically disintegrates. It's so sloppy, and so good. Also in this category is the turkey sandwich made with nothing but mayo, on squishy white bread, best eaten after a night of drinking with all your hometown friends.

5. Ice Cream. Preferrably Cookies and Cream or Coffee. There's a debate in my family over what would be harder to give up for life - steak or ice cream. We all lean towards ice cream. This creamy confection runs in our blood.

And.... is that really it? Just 5? I could play this game for awhile. All this daydreaming about food has me hungry....

Monday, August 28

What to do with an Italian Prune Plum


I had read, over and over again, the praises of the Italian Prune Plum in magazines and in my most treasured dessert cookbooks, yet I had never tried one. When I came across them at the Farmer's Market last year, I was delighted at their miniture size, and their blue-ish purple appearance. Truth be told, they didn't taste all that different to me than say, a Santa Rosa, but I had faith in their superiority.

The recipe with which I chose to christen my prune plums was out of Claudia Flemings Last Course: The Desserts of the Gramercy Tavern, which I've only used several times, but flip through quite regularly. Spiced Italian Prune Plum Crisp is the kind of recipe that has set a standard in my kitchen. I had always considered crips pretty homely, and while delicious, somewhat unsophisticated. This crisp is in another league entirely. Made with flour, ground walnuts, brown and white sugar, and kissed with the essense of cinnamon and cardamom, the topping is gently mixed by fork while melted butter is poured slowly into the bowl, creating nubby, wet crumbs that are sprinkled generously, (and in great quantity) over the quartered plums.

The glory of the Italian Prune Plum lies in its size. Because it is small, and less juicy than other plums, when it is baked, it concentrates in flavor and texture, so that the fruit maintains more of its shape, and because there is less liquid, the flavor is more intense. The crisp topping is just that: Crisp. While so many crisp toppings end up slightly gummy, this mixture ends up with a beautiful crunchy texture, somewhat along the lines of a butter cookie, but with a warm and rich flavor from the ground walnuts. While I usually can't resist the opportunity to try something new, when I saw some gorgeous Italian Prune Plums at Whole Foods on Saturday, I didn't even hesitate before pulling out this recipe again.

I would highly recommend using this crisp topping on any of your favorite fruits, but if you can find Italian Prune Plums, give them a try - it's a wonderful combination.

Enjoy!

Spiced Italian Prune Plum Crisp

"Served warm from the oven, this fragrant plum crisp makes a heavenly late-summer treat. The cinnamon and cardamom really bring out the inherent spicy flavors that develop inside cooked prune plums; and the nutty crisp topping is a delectable contrast to the soft, flavorful fruit that bubbles colorfully underneath it."

1 1/4 cups all-purpose flour (I used half whole-wheat pastry flour)
1/3 cup plus 1 tablespoon ground walnuts
1/2 cup granulated sugar
1/4 cup firmly packed dark brown sugar
1/4 teaspoon ground cinnamon
1/8 teaspoon ground cardamom (I used nutmeg instead; I didn't have cardamom)
1/2 cup (1 stick) unsalted butter, melted and cooled to room temperature
2 1/4 pounds Italian prune plums, pitted and quartered (6 cups)

Preheat the oven to 375 degrees. In a large bowl, whisk together the flour, walnuts, 1/4 cup granulated sugar, the brown sugar, cinnamon and cardamom. Slowly drizzle in the butter and combine with a fork until the mixture is crumbly. Do not allow the mixture to come together in a ball. Break up any large crumbs with your fingers. The crumbs should be smaller than 1 inch in size (otherwise they won't cook all the way through).

In another large bowl, combine the plums and the remaining 1/4 cup of granulated sugar and toss well. Spoon the fruit into a buttered 2-quart gratin or shallow casserole dish, mounding the fruit in the center. Evenly sprinkle the crumbs on top of the fruit.

Bake the crisp until the fruit is bubbling and the topping browned, 50 to 55 minutes. Serve hot or warm.

Serving suggestions: Serve with whipped creme fraiche, vanilla or basil ice cream.

Serves 8 - 10

Wednesday, August 23

Tortilla


Once again, I find myself posting about my memories of Spanish Food. How strange, since I rarely find myself thinking of the time I spent in Spain. My time in Spain has clearly embedded itself in me through culinary means, which is laughable, since upon my return home from Spain, I lamented to friends and family alike that the food in Spain was pretty boring.

In the south of the country, there is a stubborn adherence to all things traditionally Spanish. The list of tapas bar standards is short, and like any culture, the Spanish have their own classic cuisine based on what was available to them locally, and throughout the years, this cuisine is relied upon to help celebrate the unique heritage and tradition of the Spanish people. Simple grain and bean stews, soups and salads, cured and stewed meats, and plenty of rich egg tortillas were offered on every corner, and these are the dishes that taste of Spain to me.

A Spanish egg tortilla is a rich mixture of eggs, potato, and onion, most traditionally, with the occasional addition of roasted peppers, cheese, or chorizo. Plenty of olive oil contributes to the satisfying texture and mouthfeel of the tortilla, and with a simple salad alongside, it makes for a delicious light dinner. The taste of a tortilla is simple and earthy, sweet with the taste of sauteed onions and potatoes. If you've ever spent time in Spain, this recipe will transport you right back to those streetside tapas bars, drinking Spanish wine and nibbling on Manchego cheese. The taste of this tortilla is Spain, through and through.

Potato and Roasted Bell Pepper Tortilla
Recipe courtesy of Williams Sonoma

3 tablespoons olive oil
1 red onion, thinly sliced
3 teaspoons salt
¾ lb. Yukon Gold potatoes, cut into julienne
¼ inch thick
6 eggs
1 cup grated dry jack or Manchego cheese
½ teaspoon freshly ground five pepper blend
2 roasted red bell peppers, peeled, seeded and
cut into strips 1/4 inch wide

In a 10-inch nonstick fry pan over medium heat, warm 1 Tbs. of the olive oil. Add the onion and 1 tsp. of the salt and cook, stirring occasionally, until soft, 5 to 6 minutes. Transfer to a small plate.

Return the pan to medium heat and warm 1 Tbs. of the oil. Add half of the potatoes and 1/2 tsp. of the salt and stir to coat the potatoes evenly. Cover and cook for 2 minutes. Stir again, cover and cook until the potatoes are soft and golden brown, 2 to 3 minutes more. Transfer to a separate plate. Repeat with the remaining 1 Tbs. oil, potatoes and 1/2 tsp. of the salt. Wipe out the pan with a damp paper towel and set aside.

In a large bowl, whisk together the eggs, cheese, the remaining 1 tsp. salt and the pepper blend. Add the onion, potatoes and bell peppers and stir to evenly distribute the ingredients.

Set the fry pan over medium heat, pour in the egg mixture and partially cover the pan. Cook for 6 to 8 minutes. Shake the pan gently to loosen the tortilla. Invert a large plate on top of the pan and invert the pan and plate together. Lift off the pan, letting the tortilla fall onto the plate; be careful as some uncooked egg may spill out. Slide the tortilla, cooked side facing up, back into the pan and cook, uncovered, for 5 minutes. Flip the tortilla out onto another plate and let cool to room temperature. Cut into slices and serve. Serves 6 to 8.


Notes:

I became tired of standing over the stove and opted for baking the tortilla in the oven, instead of on the stovetop. If you would prefer to do so, preheat your oven to 350 degrees while you're finishing up the potatoes, pour the egg mixture into a 9-inch pie dish, and bake for about 30 minutes or so. Check the tortilla while baking; it should be firm to the touch, and it will have browned on the edges slightly.

Tuesday, August 15

Buttermilk Waffles

I look forward to breakfast on the weekend, because Dustin and I will either head to Ollie's for a scone, to the Bagel Station for egg and cheese bagels on our way to the farmer's market, or we'll whip up something special at home. I'm usually the one doing the whipping, but that suits me just fine.

I had never considered waffles anything more than a special occasion breakfast, say, for Christmas morning. Therefore, I've seen relatively few waffles on my breakfast plate througout the years. No doubt this is due to the fact that waffles require equipment - equipment that most college students lack, and few people consider to be a necessity in their kitchen. I however, dreamt of a waffle iron for quite some time before we were gifted one for our wedding, and now, waffles are one of our favorite ways to celebrate the weekend.

My sister has made Alton Brown's recipe for pancakes, and proclaimed them the best in the world, and after feasting upon them last time Dustin and I were in Chicago, I was in enthusiastic agreement with her. So, it was with anticipation and confidence that I chose his recipe for Basic Waffles to make on Sunday morning. Once again, that goofy blond did not disappoint. The waffles had excellent flavor, a good crunch, and were not terribly high in fat, like some waffle recipes can be.

We topped ours with blueberries, cooked down in some maple syrup, and sat down to eat them together on the couch, watching Napolean Dynamite for the second time this week. A fabulous start to any Sunday.

Basic Waffles
Makes 6 8-inch Round Waffles

4 3/4 ounces all-purpose flour, approximately 1 cup
4 3/4 ounces whole-wheat flour, approximately 1 cup
1/2 teaspoon baking soda
1 teaspoon baking powder
1 teaspoon salt
3 tablespoons sugar
3 whole eggs, beaten
2 ounces unsalted butter, melted
16 ounces buttermilk, room temperature
Vegetable spray, for waffle iron

Preheat waffle iron according to manufacturer's directions.
In a medium bowl whisk together the flours, soda, baking powder, salt, and sugar. In another bowl beat together eggs and melted butter, and then add the buttermilk. Add the wet ingredients to the dry and stir until combined. Allow to rest for 5 minutes.

Ladle the recommended amount of waffle batter onto the iron according to the manufacturer's recommendations. Close iron top and cook until the waffle is golden on both sides and is easily removed from iron. Serve immediately or keep warm in a 200 degree F oven until ready to serve.

Monday, August 14

Black Cod in Tomato Saffron Broth

The photograph of this dish in Martha Stewart a few months back was absolutely gorgeous, and I couldn't wait to make it, but for whatever reason, I kept putting it off, pulling out the issue every once in awhile, then tucking it back away, saving it for some future date in which a fish stew would be the perfect thing to make. That day came on Saturday, and like usual, once I looked at the recipe and read through the steps, I realized how simple and quick this dish would be, despite how impressive it looks when plated up.


A simple broth made with tomatoes, garlic, saffron, fennel seeds, and red pepper flakes provides the "bath" for chunks of white firm-fleshed fish, which cooks just until opaque, and is finished with currants, sliced green onions, and almonds. The recipe was almost too basic, and since I had some time on my hands Saturday before our dinner guests arrived, I embellished it, adding a few ingredients, and enriching the dish with extra flavor where I could.

We served the stew with fresh baguette for dipping in the beautiful broth, and a green salad on the side. It was so easy, and so delicious, that we will be making this again and again, although I'm sure it will be slightly different each time, as it is really more of an outline for making a quick fish stew.

Cod in Tomato Saffron Broth
Adapted from Martha Stewart Living

3 Tbsp olive oil
½ medium onion, thinly sliced
2 garlic cloves, thinly sliced
¼ tsp red pepper flakes
1 tsp fennel seeds
2 large pinches saffron
1 tsp dried oregano
28 ounce can whole peeled tomatoes
½ cup white wine
¼ cup dried currants
2-3 cups chicken broth
1 ½ lbs Cod, Grouper or other firm, mild white fish, Cut into 1-2 inch chunks, seasoned with salt and pepper
¼ cup sliced almonds
2 green onions, thinly sliced on the diagonal

Heat the oil in a heavy medium pot over moderate heat. Add the onion and saute until golden and slightly browned. Add the garlic and spices, along with salt and pepper, and saute until fragrant, a few minutes. Deglaze with the white wine and let it cook off. Add the tomatoes and crush with a wooden spoon. Saute for a few minutes to meld the flavors.

Add the currants, then the chicken stock, about a half cup at a time, reducing it down, then adding more once the broth has thickened. Repeat this several times, and finish with a little more broth, to reach the desired "thickness" of the broth. This is optional, but if you have the time it makes for a more flavorful broth. If you do not plan on working this step in, then only add about a cup of broth, and reduce only slightly.

When you are ready to serve, add the fish, and simmer gently until opaque throughout.

To serve, ladle the stew into shallow bowls, and garnish with green onion and sliced almonds. Serve with crusty bread.

Notes

This was great, and so easy. This is a good basic recipe to work from for a fish stew - lots of possible variations. I also added halved cherry tomatoes and cooked those down in the broth.

Sunday, August 13

Buckwheat and Honey Oatmeal Bread


I have been struggling over the past year to become a better bread-baker. I am trying to follow my mom's lead, and until this past weekend, I was beginning to think I hadn't inherited her gene for taming and transforming yeast. My breads always turned out leaden, never rising quite high enough.

My family sat down to dinner together every night, and many of those meals included homemade bread in some form. Two of our family favorites were my mom's soft white bread, swirled with cinnamon and sugar, and her oatmeal bread. I was always partial to the oatmeal bread, because although it was soft, it also had substance, and held up well to a good toasting, and topping of butter and plenty of jam.

I started to wonder if my trouble with bread didn't have something to do with my recipes, since I usually choose whole grain recipes, loaded with good things like nuts and fruits, so this time around, I chose an oatmeal bread as a benchmark, since I know in my mind what a good oatmeal bread should look and taste like. Now, I don't know if it was my recipes all along, if I'm finally getting the hang of it, or if my mom's bread lesson paid off last time I was home, but I do know that this Buckwheat and Honey Oatmeal Bread turned out wonderfully - rising to unprecedented heights, tasting slightly earthy and sweet from the grains, and boosting my confidence that I too, can make homemade bread a regular occurence in my house.

Buckwheat and Honey Oatmeal Bread
Makes 2 9x5 inch loaves

2 Tbsp (2 pkgs) Active dry yeast
1 tsp Honey
1 ⅓ cup Warm Water, (105 - 115 degrees)
1 cup Warm Milk , (105 - 115 degrees)
½ cup Honey
¼ cup Vegetable oil or melted unsalted butter
2 eggs
1 Tbsp Salt
1 cup Buckwheat Flour
2 cups Rolled oats
4 ½ - 5 cups All-purpose flour
Extra rolled oats for sprinkling

In a small bowl, sprinkle the yeast and the 1 tsp honey over 1/3 cup of the warm water. Stir to dissolve. Let stand until foamy, about 10 minutes.

In a large bowl with a whisk, or in the work bowl of a heavy-duty electric mixer fitted with the paddle attachment, combine the remaining 1 cup warm water, the warm milk, the 1/2 cup honey, oil or butter, eggs, salt, buckwheat flour, and the 2 cups oats. Add the yeast mixture and beat hard until creamy, 2 minutes. Add the remaining unbleached flour, 1/2 cup at a time, until a soft dough is formed that just clears the sides of the bowl, switching to a wooden spoon as necessary if making by hand.

Turn out the dough onto a well-floured work surface and knead until firm yet still quite soft and springy, about 3 minutes, adding only 1 Tbsp flour at a time as necessary to prevent sticking. The dough will retain a nubby, tacky quality because of the whole-grain flour. Do not add too much flour, or the bread will by dry and hard. Place in a greased deep container, turn once to coat the top, and cover with plastic wrap. Let rise in a warm place until doubled in bulk, 1 1/2 to 2 hours.

Turn out the dough onto the work surface. Divide into 3 equal portions and form into rectangular loaves. Place the loaves in 3 greased clay or metal 8 by 4 inch loaf pans that have been sprinkled on the bottom and sides with rolled oats. Cover loosely with plastic wrap and let rise at room temperature until doubled in bulk, about 1 hour. Twenty minutes before baking, preheat the oven to 350 degrees.

Bake in the center of the oven until the loaves are golden brown and sound hollow when tapped, 40 - 45 minutes. Remove from the pans to racks to cool completely before baking.

Notes
I made 2 large loaves in 9 x 5 pans instead.

Thursday, August 10

I Dream of Andalusia

I've been to Spain twice in my life. The first time in high school, when my peers and I, accompanied by two overbearing chaparones, traveled by bus across the Spanish countryside. Our main appreciation of Spain at that point was the easy access to beer and cigarettes, and my palate so underdeveloped at the time, that I subsisted solely grilled cheese and gazpacho for the entire two weeks.

My second rendevous with Spain was during college, when I lived there for half a year. Needless to say, the second time around I got much more intimate with that hot-blooded country, and I got to experience the best side of Spanish cooking - home cooking. My senora, Lola, was a simple cook, but her food is still burned into my memory. Her stews were outstanding, always made with homemade broth, and probably cooked with animal parts I'm much more comfortable not knowing about. There was one morning, when I looked up from my toast to see a gigantic tail being pulled from a bag on the counter. I said "Dios Mio, Lola!", and she about died laughing. I never did find out what animal that tail belonged to - not sure I wanted to.


There were many dishes I came to love while in Spain, but of them all, gazpacho has remained one of my favorites - something I look forward to making as soon as the weather turns warm. I used to use Ina Garten's gazpacho recipe exclusively. I thought it was gazpacho perfection, but friends, I have found a new gazpacho to compete with my beloved Barefoot recipe. I have started helping out a local personal chef, who also caters small events and parties, and Wednesday was my first night in the kitchen with her. And my first catered dish to prepare? You guessed it. Gazpacho.

Holly is a great chef, and I'm so glad she shared this gazpacho recipe with me. Both recipes have their charms, but this one has the interesting addition of a garlic and egg mash which is blended in with the vegetable mixture, along with breadcrumbs, for body and substance. There are a few other ingredients I was surprised to see in there, but I can assure you, they make for one harmonious and interesting bowl of soup...it takes me right back to Spain, and there is absolutely nothing better to eat in the dog days of summer, no matter what country you live in.

Enjoy!

Holly's Gazpacho
Serves 8

2 cups fresh plum tomatoes, chopped
1 yellow pepper, chopped
1 English cucumber, chopped
½ cup red onion, finely chopped
2 serranos or jalapenos, minced
½ lemon , juiced
2 cups chicken broth
¼ cup olive oil
¼ cup red wine vinegar
¼ cup parsley, finely minced
2 tablespoons fresh basil, chiffonade
2 Tbsp Worcestershire sauce
Tabasco, to taste
Coarsely ground black pepper
46 ounces tomato juice
1 cup plain bread crumbs

For Garlic & Egg Paste:
3 cloves garlic, minced
2 eggs

Make the egg/garlic paste:
Place the eggs in a small pot of cold water, bring to a boil, and let simmer for 10 minutes. Sprinkle the garlic with kosher salt and set in a small bowl. When the eggs are finished cooking, peel and rinse, then add to the garlic and salt mixture, and mash together with a fork.

Make the Soup Base: In a large bowl, combine the tomatoes, pepper, cucumber, red onion, olive oil, lemon juice, chicken broth, red wine vinegar, parsley, basil, worcestershire, and season with freshly ground black pepper. Stir to combine.

Pour the tomato juice into the bowl with the vegetables, then add the garlic and egg mixture, along with the bread crumbs and stir to combine.

Using a handheld mixer, puree the soup to an even consistency, or use the food processor, in batches, to puree the soup. Taste for seasoning, and adjust with additional salt, pepper, or tabasco.

Chill for at least 4 hours, or preferably overnight. Garnish with additional minced hardboiled egg, olives, red onion, or parsley.

Notes:
This gazpacho will keep in the fridge for up to a week. The garlic and egg mixture adds body and substance to the soup, but you can leave it out if you prefer a more subtle taste.

Monday, August 7

How My Peach Became a Cobbler


When I come home from the farmer's market, toting a basket of fruit, the inevitable chain of events that follows goes something like this: I place the fruit on the counter, walk over to my recipe binders to grab the blue dessert binder, then go stand in front of my cookbook cabinet, scanning titles, mentally flipping the pages I know so well, grab a few books for inspiration, then plop myself on the couch, preferrably with a cup of coffee in hand, to decide what fate my little fruits will meet.

A perfect piece of fruit sometimes needs no accompaniment at all, but usually I can't resist an opportunity to pull out the flour and sugar, so that perfect piece of fruit becomes a perfect little dessert. In the world of desserts, there is terrain I've yet to explore...treats and goodies that have never emerged from my oven, such as madeleines and canneles. But when it comes to fruit, I always ponder the classic options first - will it be a pie this time, or a tart? A cobbler or a buckle? A crisp or a slump? Or, a cake, with tender pieces of fruit tucked inside?

The answer to these questions depends on what my motivation is that particular day. If I'm baking for the sake of baking, it's probably a pie, if it's for my loving husband, he will probably ask for a cobbler, and if it's just for me, I adore a good crisp, with a big melting scoop of ice cream on top. This time around, the fruit at hand was the noble peach, and the motivation was my sweetie, so peach cobbler it was! The recipe I chose was from the cookbook I've mentioned before, Ripe for Dessert, by David Lebovitz. The following recipe is adapted slightly from the original - Nectarine and Blueberry Cobbler with Big Fluffy Biscuits.

Peach Cobbler
Adapted from Ripe for Dessert, by David Lebovitz
Serves 6

For Fruit Filling:
7-9 medium ripe peaches, peeled (about 3 lbs)
4-6 tablespoons sugar, depending on the sweetness of your peaches
2 teaspoons lemon juice
2 teaspoons flour
1 teaspoon vanilla extract
Optional: One 6 ounce basket blueberries, raspberries or blackberries

For Biscuits:
1 1/2 cups flour
1 teaspoon baking powder
1/4 teaspoon baking soda
1/4 teaspoon salt
2 teaspoons sugar
1/2 teaspoon cinnamon
1/4 teaspoon nutmeg
Pinch of ground ginger
4 tablespoons unsalted butter, frozen
2/3 cup buttermilk
1 large egg yolk
1 teaspoon milk

Position your oven rack in the middle and preheat the oven to 375 degrees. Cut the peaches in half, remove the pits, then cut into 1/2 inch slices. In a large mixing bowl, toss the peaches with the sugar, lemon juice, flour, vanilla, and berries if using.

Transfer the mixture to a 2-quart baking dish and roast the fruit for 30-40 minutes, turning once during baking, until nicely softened, and the juice have released.

To make the biscuits, combine the flour, baking powder, baking soda, salt and 2 teaspoons of sugar in a medium bowl. Using the largest holes on a box grater, grate the frozen butter into the flour mixture. Stir in the buttermilk until the dry ingredients are just moistened. Spoon the biscuit batter over the fruit in roughly 6 equal mounds.

Mix the egg yolk with the milk and brush over the tops of the biscuits, then dust liberally with additional sugar and place the cobbler back in the oven for 20 - 25 minutes, until the biscuits are golden brown.

Notes: I loved the method David used here of grating the frozen butter into the biscuit batter - it was so easy, and the biscuits really did turn out big, fluffy, and tender. The original recipe did not call for any spices in the biscuits, but I wouldn't skip them...that was the one thing everyone commented on, and the biscuits might seem a little bland without them, as they are fairly low in fat. Next time I might even play around with adding a touch more sugar to the biscuits, or something like finely chopped nuts or candied ginger.

Friday, August 4

A Sauce to Build a Sandwich On


Last weekend Dustin and I spent 2 days with our wonderful friends Ali and Ty, who happen to live in a town I totally adore - Asheville, North Carolina. Ali and I have been friends for 20 years now (we love to brag about that), and when she said she was moving to Asheville, my heart fluttered and danced around in my chest. And then imagine how overjoyed I was when my other best friend, Jenni, and her boyfriend Adam decided to up and move to Asheville too! Since they moved here a year ago, we've been to visit often, and we always drive back down the mountain on Sunday with our bellies full and our heads slightly aching. We tend to party enough Saturday night that Sunday morning always warrants a large and filling breakfast or brunch before we leave town.

Mostly I love Asheville because of my dear friends there, but I'd be lying if I didn't admit an alterior motive for our frequent visits. Asheville is chock full of great restaurants...mostly they are small, family run places with good honest food. Being a town full of colorful characters, Asheville never wants for variety or action, which is why I'm so drawn to it, and it's food.

Last weekend, when we pulled into town, our collective hunger led us out into the heat to search for a good vegetarian lunch spot. We ended up at Rosetta's - a funky little spot with a huge menu and a wealth of creative and unique vegetarian dishes. Ali ordered her standard - a smoked tofu and avocado sandwich with walnut sauce. I ordered the same, and when it was all said and done, I was one happy luncher. We were barely out the door and I started wondering how to make that walnut sauce, so I could recreate that fabulous sandwich at home.


The walnut herb sauce at Rosetta's was smooth and very rich - I made my sauce chunkier, because I wanted some texture and crunch, and I used a smaller amount of tahini (I'm guessing). With some internet searching under my belt, at lunch today I set about making my version of the walnut herb sauce, and I paired it again with smoked tofu, but I chose a beautiful slice of tomato from our garden over the avocado. The tomato added a brightness to the sandwich that I was missing before. Some spinach to get my greens in, and 2 slices of spelt bread made it official - this is a sandwich worth making again.

Walnut Tahini Sauce
Serves 4

1 cup walnuts
2 Tbsp. tahini (roasted)
3 - 4 Tbsp. lemon juice
1-2 big handfuls parsley leaves
2 cloves garlic
2 tsp. olive oil
Sea salt and fresh ground black pepper

Combine everything in a mini food processor and blend until it reaches your desired consistency. Taste for seasoning.

Note: If you wanted a smooth sauce, you would need to add more tahini and lemon juice, or olive oil. This sauce might be difficult to make in a regular sized food processor unless you made a larger quantity. If you wanted to make a small quantity and don't have a mini food prep, I'd try a mortle and pestle or just mince everything fine and combine well.

If you are making the sandwich above, definitely use smoked tofu - it adds so much flavor.

Thursday, August 3

Ginger Molasses Barbequed Pork

Last week I went to a cooking class which is held by two local women who've turned their passion for cooking into more than just a pastime. Holly and Lee have been teaching these classes in Holly's home for about 5 years now, and have attracted a large and loyal following. There is a new class every 6 weeks, often with a new theme. Some themes are so popular that people demand a repeat, but usually the material is fresh. A newsletter goes out which announces the theme and lists the dishes that they will be preparing for the class. The theme last week was "Can't Stand the Heat", and the last class sounded too good for me to pass up.

On the menu was Thai Spiced Watermelon Soup with Lump Crab, Swordfish Skewers with Cilantro Lime Butter Sauce, Pork Tenderloin with a Ginger Molasses BBQ Sauce, Toasted Caraway and Celery Seed Coleslaw, and Sundried Tomato Pesto Pasta. There is always a dessert, and it is always fabulous. Lee makes the desserts, and this woman is not afraid of butter and sugar, in fact, her desserts are always the richest I've had, but so good that they are well worth it. This time we sampled her "Chocolate Coma" ice cream, which was hands down the most luciously chocolately ice cream I've had.... it was like frozen chocolate pudding. She also made a Dulce de Leche ice cream that was wonderful.


These are all recipes that I am looking forward to making again soon, but I chose the Pork as my first repeat. This is a fabulous recipe. The barbeque sauce is so rich with molasses and sugars that it ends up being almost black, and the ginger is a new and welcome addition to your typical barbeque sauce. And if you're careful not to overcook it, the pork turns out so wonderfully tender. This recipe is a definite keeper. I had every intention of making the Coleslaw from class as well, but Whole Foods didn't have one ingredient I needed, so I canned the whole plan and just bought some premade coleslaw. Admittedly, I wish I had made the trek over to the Harris Teeter for my missing ingredient, but the substitute coleslaw worked in a pinch. I am going to include the coleslaw recipe as well below, because it is a great recipe to have in your repetoire.

Pork Tenderloin with Ginger Molasses BBQ Sauce
Courtesy of the Gourmet Everyday Chefs, Holly and Lee

For the Sauce:
6 tablespoons apple cider vinegar
3 tablespoons sugar
6 tablespoons ketchup
6 tablespoons molasses (I used blackstrap)
1 tablespoon garlic, minced
1 serrano pepper, minced (seeds included if you want it hot)
1/2 tablespoon fresh ginger root, peeled and minced

For the Pork:
1 1/2 pounds pork tenderloin, trimmed and sliced into 1-inch pieces (I used Niman Ranch Pork)

Make the Sauce:
Sitr together all the ingredients for the sauce in a heavy saucepan. Simmer over moderately low heat, uncovered, stirring occasionally until slightly thickened and reduced to about 1 cup. Remove from the heat to cool.

Make the Pork:
Take 1/2 cup of the sauce for the pork marinade and reserve the other 1/2 cup for the sauce. Marinate the pork with the 1/2 cup marinade for a few hours, or overnight. Removed the pork from the marinade and grill the pieces over medium heat either on a preheated indoor grill pan, or outdoors. Brush the pork with the marinade as you're grilling it, and remove the pork when it is barely pink in the middle. It won't take long to cook the pieces.

Heat the reserved sauce until warm. If you are making bbq pork sandwiches, use the sauce to spread on the buns. If you are serving a large platter of pork, pour the sauce over and serve immediately.

Note: If using the pork for sandwiches, a great topping is the Toasted Caraway and Celery Seed Coleslaw. You can also skewer the pork with fruits and vegetables for kebabs. Peaches, pineapple and tomato would all be delicious alongside this sticky pork.

Serves 6

Coleslaw with Toasted Caraway & Celery Seeds

1 tsp. caraway seeds
1 tsp. celery seeds
1/2 c. water
1 cup mayonaise
1/2 cup heavy cream
1/4 cup sugar
1/2 onion, chopped
2 garlic cloves, minced
3 Tbsp. apple cider vinegar
1 Tbsp. lemon juice
1/2 tsp. cayenne pepper
1/2 tsp. each kosher salt and fresh black pepper
1 lb. package coleslaw with carrots
1 granny smith apple, peeled and cut into matchsticks

In a small skillet, toast the seeds over moderate high heat until fragrant, about 30 seconds. Add the water and let cool.

In a blender, combine the mayo, cream, sugar, onion, garlick, vinegar, lemon juice, cayenne, salt and pepper. Blend until mixed, then add the caraway and celery seeds and their liquid and blend until smooth. Taste and adjust the seasonings. Adjust the consistency with additional mayo if it is too thin.

Toss the dressing with the coleslaw and apples in a large bowl and refrigerate for several hours, or overnight.

Serves 8
Vermont Farm Table