Showing posts with label summer. Show all posts

Thursday, August 31

Mediteranean Bean Panzanella


Dustin and I have grown terribly fond of panzanellas. So easy, so versatile, and healthy to boot. It's the perfect summer meal, when you get home from work and would rather sit outside, sipping a beer than throw something together for dinner. And, since it's just the two of us, and I have a weakness for purchasing delicious artisinal bread, which we can never finish, we always have leftover bread laying around. And people, if I made bread pudding everytime we had leftover bread, my pants would no longer fit.

The first time I made panzanella was actually only a few months ago. I tore out a recipe card from Martha Stewart for a Meditteranean Panzanella, with green beans, olives, red onion, and feta. From that point on we were hooked. I've made a few panzanellas since then, but the one that we had for dinner last night was by far the best yet. Having some leftover flageolet beans, and the last of our tomatoes from the garden, which I roasted in the oven with thyme and garlic, dinner was practically made before I even started.

Hopefully you'll make this, or use it as inspiration to create your own panzanella. Although it's usually considered a summer dish, I've already been envisioning fall versions, with roasted squash, or some roasted peppers, or maybe even a variation with some steak and blue cheese. If you love beans though, absolutely give this a try. I totally adore beans, and this was meal perfection for me.

Mediteranean Bean Panzanella
Serves 2

For Dressing
2 Tbsp good-quality olive oil
2 Tbsp red wine vinegar
1 tsp Dijon mustard
Salt and Fresh Ground Pepper

For Salad
1 1/2 cups beans, preferably a soft-textured white bean
1/2 cup roasted tomatoes
1/4 red onion, thinly sliced
8 oil-cured black olives, chopped
Handful of flat-leaf parsley, chopped
Feta or goat cheese for garnish, optional

2 Thick slices good-quality bread, cut 1-inch thick

Preheat your oven to broil. In a large bowl, combine the ingredients for the dressing, mixing well to emulsify. Toss the onion, and olives in the bowl, and let sit while you prepare the rest of the salad.

Warm the beans and roasted tomatoes in a small saucepan (drain and rinse if using canned; add a splash of olive oil or chicken broth to moisten) over medium-low heat. In the meantime, place your bread slices under the broiler, and toast evenly to a golden brown on both sides. Remove from the oven.

Add the beans and tomatoes to the bowl with the dressing, and toss gently to combine. Cut the bread into 1-inch cubes, and add to the salad, along with the chopped parsley. Toss gently again, to thoroughly mix ingredients and moisten the bread with the dressing.

Divide the salad among 2 bowls and top with cheese if desired.

Monday, August 28

What to do with an Italian Prune Plum


I had read, over and over again, the praises of the Italian Prune Plum in magazines and in my most treasured dessert cookbooks, yet I had never tried one. When I came across them at the Farmer's Market last year, I was delighted at their miniture size, and their blue-ish purple appearance. Truth be told, they didn't taste all that different to me than say, a Santa Rosa, but I had faith in their superiority.

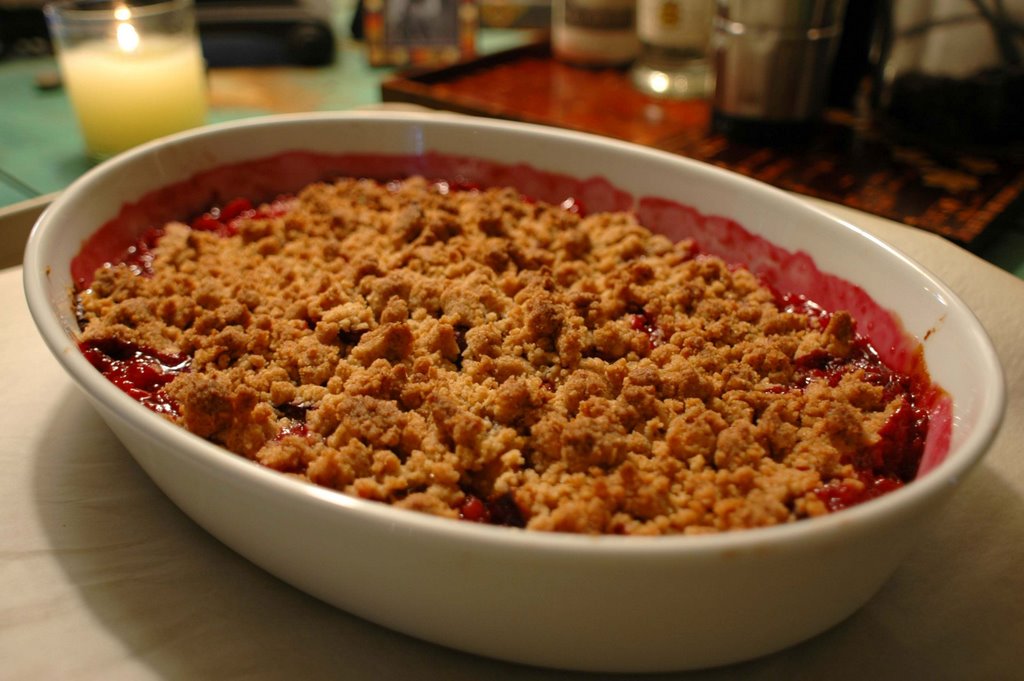
The recipe with which I chose to christen my prune plums was out of Claudia Flemings Last Course: The Desserts of the Gramercy Tavern, which I've only used several times, but flip through quite regularly. Spiced Italian Prune Plum Crisp is the kind of recipe that has set a standard in my kitchen. I had always considered crips pretty homely, and while delicious, somewhat unsophisticated. This crisp is in another league entirely. Made with flour, ground walnuts, brown and white sugar, and kissed with the essense of cinnamon and cardamom, the topping is gently mixed by fork while melted butter is poured slowly into the bowl, creating nubby, wet crumbs that are sprinkled generously, (and in great quantity) over the quartered plums.

The glory of the Italian Prune Plum lies in its size. Because it is small, and less juicy than other plums, when it is baked, it concentrates in flavor and texture, so that the fruit maintains more of its shape, and because there is less liquid, the flavor is more intense. The crisp topping is just that: Crisp. While so many crisp toppings end up slightly gummy, this mixture ends up with a beautiful crunchy texture, somewhat along the lines of a butter cookie, but with a warm and rich flavor from the ground walnuts. While I usually can't resist the opportunity to try something new, when I saw some gorgeous Italian Prune Plums at Whole Foods on Saturday, I didn't even hesitate before pulling out this recipe again.

I would highly recommend using this crisp topping on any of your favorite fruits, but if you can find Italian Prune Plums, give them a try - it's a wonderful combination.

Enjoy!

Spiced Italian Prune Plum Crisp

"Served warm from the oven, this fragrant plum crisp makes a heavenly late-summer treat. The cinnamon and cardamom really bring out the inherent spicy flavors that develop inside cooked prune plums; and the nutty crisp topping is a delectable contrast to the soft, flavorful fruit that bubbles colorfully underneath it."

1 1/4 cups all-purpose flour (I used half whole-wheat pastry flour)
1/3 cup plus 1 tablespoon ground walnuts
1/2 cup granulated sugar
1/4 cup firmly packed dark brown sugar
1/4 teaspoon ground cinnamon
1/8 teaspoon ground cardamom (I used nutmeg instead; I didn't have cardamom)
1/2 cup (1 stick) unsalted butter, melted and cooled to room temperature
2 1/4 pounds Italian prune plums, pitted and quartered (6 cups)

Preheat the oven to 375 degrees. In a large bowl, whisk together the flour, walnuts, 1/4 cup granulated sugar, the brown sugar, cinnamon and cardamom. Slowly drizzle in the butter and combine with a fork until the mixture is crumbly. Do not allow the mixture to come together in a ball. Break up any large crumbs with your fingers. The crumbs should be smaller than 1 inch in size (otherwise they won't cook all the way through).

In another large bowl, combine the plums and the remaining 1/4 cup of granulated sugar and toss well. Spoon the fruit into a buttered 2-quart gratin or shallow casserole dish, mounding the fruit in the center. Evenly sprinkle the crumbs on top of the fruit.

Bake the crisp until the fruit is bubbling and the topping browned, 50 to 55 minutes. Serve hot or warm.

Serving suggestions: Serve with whipped creme fraiche, vanilla or basil ice cream.

Serves 8 - 10

Monday, August 7

How My Peach Became a Cobbler


When I come home from the farmer's market, toting a basket of fruit, the inevitable chain of events that follows goes something like this: I place the fruit on the counter, walk over to my recipe binders to grab the blue dessert binder, then go stand in front of my cookbook cabinet, scanning titles, mentally flipping the pages I know so well, grab a few books for inspiration, then plop myself on the couch, preferrably with a cup of coffee in hand, to decide what fate my little fruits will meet.

A perfect piece of fruit sometimes needs no accompaniment at all, but usually I can't resist an opportunity to pull out the flour and sugar, so that perfect piece of fruit becomes a perfect little dessert. In the world of desserts, there is terrain I've yet to explore...treats and goodies that have never emerged from my oven, such as madeleines and canneles. But when it comes to fruit, I always ponder the classic options first - will it be a pie this time, or a tart? A cobbler or a buckle? A crisp or a slump? Or, a cake, with tender pieces of fruit tucked inside?

The answer to these questions depends on what my motivation is that particular day. If I'm baking for the sake of baking, it's probably a pie, if it's for my loving husband, he will probably ask for a cobbler, and if it's just for me, I adore a good crisp, with a big melting scoop of ice cream on top. This time around, the fruit at hand was the noble peach, and the motivation was my sweetie, so peach cobbler it was! The recipe I chose was from the cookbook I've mentioned before, Ripe for Dessert, by David Lebovitz. The following recipe is adapted slightly from the original - Nectarine and Blueberry Cobbler with Big Fluffy Biscuits.

Peach Cobbler
Adapted from Ripe for Dessert, by David Lebovitz
Serves 6

For Fruit Filling:
7-9 medium ripe peaches, peeled (about 3 lbs)
4-6 tablespoons sugar, depending on the sweetness of your peaches
2 teaspoons lemon juice
2 teaspoons flour
1 teaspoon vanilla extract
Optional: One 6 ounce basket blueberries, raspberries or blackberries

For Biscuits:
1 1/2 cups flour
1 teaspoon baking powder
1/4 teaspoon baking soda
1/4 teaspoon salt
2 teaspoons sugar
1/2 teaspoon cinnamon
1/4 teaspoon nutmeg
Pinch of ground ginger
4 tablespoons unsalted butter, frozen
2/3 cup buttermilk
1 large egg yolk
1 teaspoon milk

Position your oven rack in the middle and preheat the oven to 375 degrees. Cut the peaches in half, remove the pits, then cut into 1/2 inch slices. In a large mixing bowl, toss the peaches with the sugar, lemon juice, flour, vanilla, and berries if using.

Transfer the mixture to a 2-quart baking dish and roast the fruit for 30-40 minutes, turning once during baking, until nicely softened, and the juice have released.

To make the biscuits, combine the flour, baking powder, baking soda, salt and 2 teaspoons of sugar in a medium bowl. Using the largest holes on a box grater, grate the frozen butter into the flour mixture. Stir in the buttermilk until the dry ingredients are just moistened. Spoon the biscuit batter over the fruit in roughly 6 equal mounds.

Mix the egg yolk with the milk and brush over the tops of the biscuits, then dust liberally with additional sugar and place the cobbler back in the oven for 20 - 25 minutes, until the biscuits are golden brown.

Notes: I loved the method David used here of grating the frozen butter into the biscuit batter - it was so easy, and the biscuits really did turn out big, fluffy, and tender. The original recipe did not call for any spices in the biscuits, but I wouldn't skip them...that was the one thing everyone commented on, and the biscuits might seem a little bland without them, as they are fairly low in fat. Next time I might even play around with adding a touch more sugar to the biscuits, or something like finely chopped nuts or candied ginger.

Thursday, August 3

Ginger Molasses Barbequed Pork

Last week I went to a cooking class which is held by two local women who've turned their passion for cooking into more than just a pastime. Holly and Lee have been teaching these classes in Holly's home for about 5 years now, and have attracted a large and loyal following. There is a new class every 6 weeks, often with a new theme. Some themes are so popular that people demand a repeat, but usually the material is fresh. A newsletter goes out which announces the theme and lists the dishes that they will be preparing for the class. The theme last week was "Can't Stand the Heat", and the last class sounded too good for me to pass up.

On the menu was Thai Spiced Watermelon Soup with Lump Crab, Swordfish Skewers with Cilantro Lime Butter Sauce, Pork Tenderloin with a Ginger Molasses BBQ Sauce, Toasted Caraway and Celery Seed Coleslaw, and Sundried Tomato Pesto Pasta. There is always a dessert, and it is always fabulous. Lee makes the desserts, and this woman is not afraid of butter and sugar, in fact, her desserts are always the richest I've had, but so good that they are well worth it. This time we sampled her "Chocolate Coma" ice cream, which was hands down the most luciously chocolately ice cream I've had.... it was like frozen chocolate pudding. She also made a Dulce de Leche ice cream that was wonderful.


These are all recipes that I am looking forward to making again soon, but I chose the Pork as my first repeat. This is a fabulous recipe. The barbeque sauce is so rich with molasses and sugars that it ends up being almost black, and the ginger is a new and welcome addition to your typical barbeque sauce. And if you're careful not to overcook it, the pork turns out so wonderfully tender. This recipe is a definite keeper. I had every intention of making the Coleslaw from class as well, but Whole Foods didn't have one ingredient I needed, so I canned the whole plan and just bought some premade coleslaw. Admittedly, I wish I had made the trek over to the Harris Teeter for my missing ingredient, but the substitute coleslaw worked in a pinch. I am going to include the coleslaw recipe as well below, because it is a great recipe to have in your repetoire.

Pork Tenderloin with Ginger Molasses BBQ Sauce
Courtesy of the Gourmet Everyday Chefs, Holly and Lee

For the Sauce:
6 tablespoons apple cider vinegar
3 tablespoons sugar
6 tablespoons ketchup
6 tablespoons molasses (I used blackstrap)
1 tablespoon garlic, minced
1 serrano pepper, minced (seeds included if you want it hot)
1/2 tablespoon fresh ginger root, peeled and minced

For the Pork:
1 1/2 pounds pork tenderloin, trimmed and sliced into 1-inch pieces (I used Niman Ranch Pork)

Make the Sauce:
Sitr together all the ingredients for the sauce in a heavy saucepan. Simmer over moderately low heat, uncovered, stirring occasionally until slightly thickened and reduced to about 1 cup. Remove from the heat to cool.

Make the Pork:
Take 1/2 cup of the sauce for the pork marinade and reserve the other 1/2 cup for the sauce. Marinate the pork with the 1/2 cup marinade for a few hours, or overnight. Removed the pork from the marinade and grill the pieces over medium heat either on a preheated indoor grill pan, or outdoors. Brush the pork with the marinade as you're grilling it, and remove the pork when it is barely pink in the middle. It won't take long to cook the pieces.

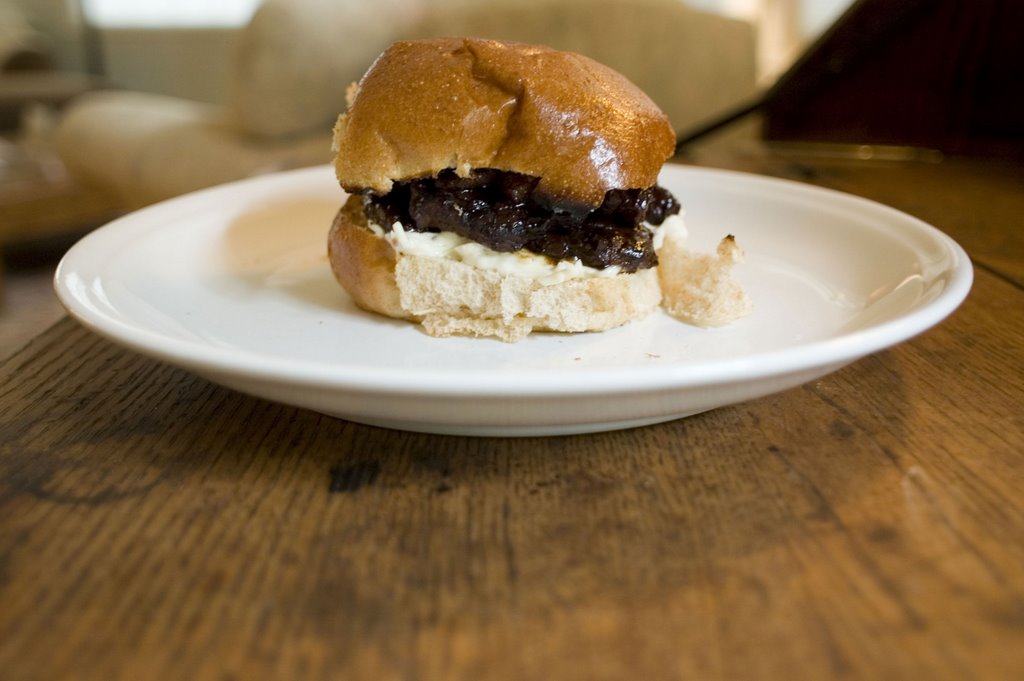
Heat the reserved sauce until warm. If you are making bbq pork sandwiches, use the sauce to spread on the buns. If you are serving a large platter of pork, pour the sauce over and serve immediately.

Note: If using the pork for sandwiches, a great topping is the Toasted Caraway and Celery Seed Coleslaw. You can also skewer the pork with fruits and vegetables for kebabs. Peaches, pineapple and tomato would all be delicious alongside this sticky pork.

Serves 6

Coleslaw with Toasted Caraway & Celery Seeds

1 tsp. caraway seeds
1 tsp. celery seeds
1/2 c. water
1 cup mayonaise
1/2 cup heavy cream
1/4 cup sugar
1/2 onion, chopped
2 garlic cloves, minced
3 Tbsp. apple cider vinegar
1 Tbsp. lemon juice
1/2 tsp. cayenne pepper
1/2 tsp. each kosher salt and fresh black pepper
1 lb. package coleslaw with carrots
1 granny smith apple, peeled and cut into matchsticks

In a small skillet, toast the seeds over moderate high heat until fragrant, about 30 seconds. Add the water and let cool.

In a blender, combine the mayo, cream, sugar, onion, garlick, vinegar, lemon juice, cayenne, salt and pepper. Blend until mixed, then add the caraway and celery seeds and their liquid and blend until smooth. Taste and adjust the seasonings. Adjust the consistency with additional mayo if it is too thin.

Toss the dressing with the coleslaw and apples in a large bowl and refrigerate for several hours, or overnight.

Serves 8

Monday, July 3

Lake Food

I grew up in the Midwest, where thousands of families flock to the closest body of water on weekends and holidays alternately to relax, and punish themselves with all sorts of water sports, which leave them groaning and aching on Monday mornings. Spending the entire day baking in the sun, with the sound of boat engines and waves lapping in the background, and the complete exhaustion that comes at the end of a day at the lake, is one of my fondest childhood memories.

And what would a fond memory be without some reference to the food that was enjoyed during those blissful times? There was a tiny place on the lake where we boated, and now have a lake house, which we called "McGoos". The origin of this name is somewhat of a mystery, since the actual name is "Gordy's", but we like the name, and so that's what we call it. We would pull our boat up to the dock in front of McGoo's, hop onto the scorching deck, high-step it the 30 feet or so to the inevitable line forming outside the tiny shack that is McGoo's, and wait in line, discussing whether it would be a hamburger, hot dog, or a soggy that day. For those of you unfamiliar with a Soggy, it is a an ode to what the Midwest does best; simple comfort food. Some cubes of leftover french bread (more likely italian beef buns) are drenched in Au Jus, and covered in a layer of mozzarella cheese, which is toasted until hot and covered with golden bubbles. There is nothing sexy or terribly attractive about a soggy, but in the world of comfort food, it reigns supreme.

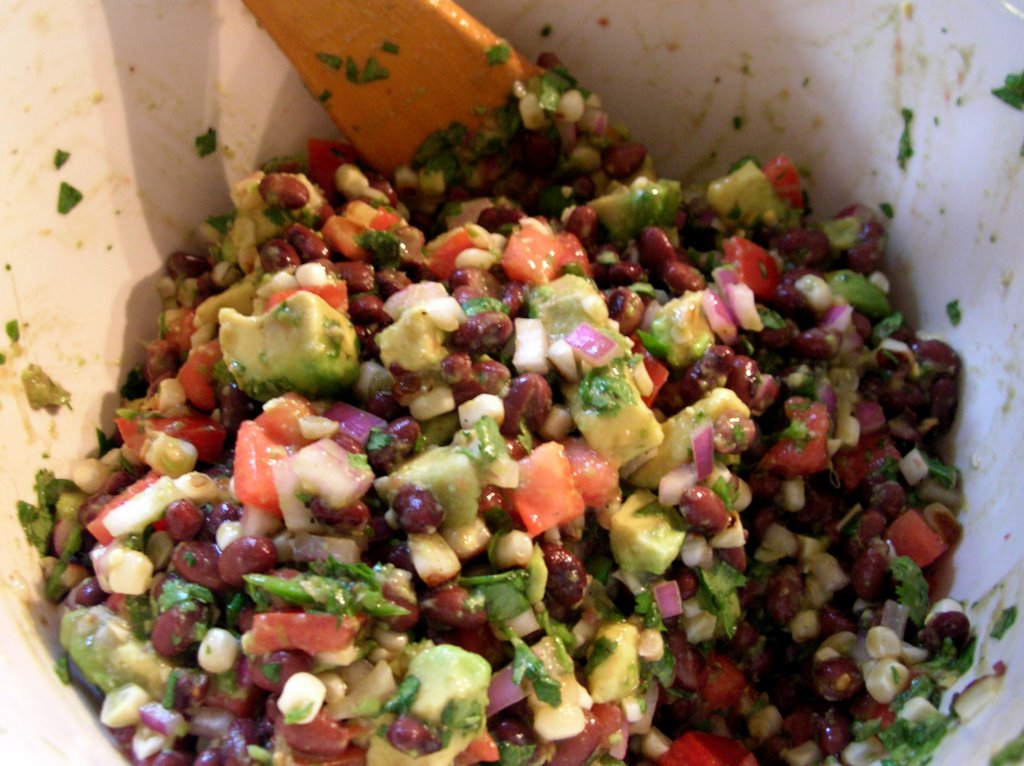
When we were invited last week to spend the weekend at our friend Josh's family lakehouse, we wanted to bring something along that would sustain us all for the weekend - a snack that everyone would enjoy, and that was easy to make. Nowadays, there are so many things that I like to call Lake Food, I've realized that this classification falls upon anything that tastes even more delicious eaten in the sun, accompanied by an ice cold beer. We decided to make Black Bean Salsa, which is our becoming a classic in our house, because you can make a gigantic bowl, and feast upon it for days.


This salsa is like a meal...chock full of beans, avocado, big chunks of tomato, and corn, it is deeply satisfying, and tastes delicious atop a salty chip, washed down with a fine American brew. This salsa happens to be Dustin's specialty, and he never cooks from a recipe, so I'll give general measurements, because really, everything is to taste. After two full days of wakeboarding, toasting ourselves in the sun, and emptying our gigantic cooler of beer, the salsa was gone, and we were sun-kissed and exhausted - a wonderful way to end a weekend.

Black Bean Salsa

2 cans black beans, rinsed and drained
2 ears corn, either boiled or roasted
2 large or 3 medium tomatoes, cut into small chunks and drained
2 firm-ripe avocados, cut into medium chunks
1 red onion, diced small
3 garlic cloves, minced
2-3 limes
1 bunch of cilantro
Olive oil
Red wine vinegar
Salt and pepper

Place the black beans into a large serving bowl. After the corn has cooled, cut the kernels off the cob and add to the black beans, along with the tomatoes, red onion, and garlic. Toss to combine.

Drizzle the mixture with olive oil and about 2 tablespoons of red wine vinegar, or to taste. Squeeze the limes over the mixture, and season with salt and pepper. Let the mixture sit for about fifteen minutes before tasting for seasonings again.

You can wait until just before serving to add the avocado chunks and chopped cilantro, but we add it all at once - after awhile the avocado will start to break down, but it usually last a full day or two before that happens.

Also keep in mind that you can add anything you think would be tasty to this salsa - it's as flexible as you are. We added fresh basil and mint from our garden this time, since we have an abundance of both!

Monday, June 26

To All the Corn I've Loved Before

This entry is for all the corn lovers out there. And for my lovely friend Nicki. She, like myself, can appreciate a good dose of cornmeal now and then. Maybe it's because I was raised in the Midwest, or maybe my mom ate a lot of corn while I was in the womb, but more likely, I am addicted to corn because it's sweet and tasty, and it appears in so many culinary guises that you could eat it every day and never tire of it. I will of course mention that there is one corn product I avoid at all costs; high-fructose corn syrup. The evils of this substance are widely known, so I will not bore you with my opinion on the matter.

While most people would dare not deny that corn on the cob, in the sweet days of late summer, is one of life's great pleasures, I'd like to draw your attention to the oft-underappreciated grain, cornmeal, and more specifically, the stone-ground variety. The difference between supermarket variety cornmeal and stone-ground cornmeal is that the stone-ground still retains the germ of the dried kernel, which translates to greater flavor, and a better nutritional profile.

This weekend Dustin and I decided to cook up a good old Southern meal, featuring barbequed chicken, greens with vinegar, and Vermont-Cheddar Spoonbread; a recipe I've had marked in my Best of Cooking Light cookbook since I got it 3 years ago. I might have chosen to accompany the meal with one of my favorites, Cornlight Bread, or the excellent Fresh-Corn Polenta I made last week, but I was in the mood to dabble in the unknown....and I'm glad I did. The spoonbread had all the best qualities of cornbread, but was light and slightly eggy, making a savory companion to the chicken and greens.


Vermont Cheddar Spoonbread
Adapted from Cooking Light

Cooking spray for dish
1/2 cup plus 2 teaspoons cornmeal, preferably stone-ground
1 1/2 cups skim milk (or 2%)
Salt and Pepper to taste
1 large egg, lightly beaten
2 large egg whites
1/2 cup (2 oz) shredded sharp Vermont Cheddar, (Parmesan or Asiago would be great, too), or more to taste
Chopped fresh herbs, such as chives, optional
Fresh Corn Kernels, optional

Preheat oven to 375 degrees.

Spray a one-quart souffle dish with cooking spray and sprinkle evenly with 2 teaspoon cornmeal.

Combine 1/2 cup cornmeal, milk, salt, and black pepper in a medium saucepan, and cook over medium heat 5 minutes or until thick, stirring constantly. Remove from heat.

Gradually stir 1/2 cup hot cornmeal mixture into egg yolk, and add to remaining cornmeal mixture, stirring constantly. Pour into a large bowl; cool completely.

Beat egg whites at high speed of a mixer until stiff peaks form. Gently fold egg whites and cheese into cornmeal mixture, and any additional herbs or vegetables. Spoon batter into prepared dish. Bake at 375° for 1 hour or until puffy and browned. Serve immediately.

Serves 4, or 2 people who really love corn.
Vermont Farm Table