Monday, October 30

Guilty.


Yes, I've been known to sneak all the cherries out of the fruit bowl, and I've been caught more than once stealing extra frosting off the cake to put on my slice. I've even developed a reputation with my mother-in-law as that elicits warnings whenever one of her poundcakes and yours truly find themselves in the same room together... I will shamelessly cut just the crust off the poundcake, and leave that naked wobbly slice there in cold to fend for itself. I am guilty as charged of non-egalitarian eating. Forget the notion of building up to the climax, or saving the best for last, or even the idea that you don't deserve the frosting unless you eat the cake with it.

I'm not totally without dignity though. Ideally, a dessert or anything else for that matter, should be so good through and through that you don't want to give up a single crumb. It's a fine eating experience that finds you meticulously planning each bite so that you end with the ideal ratio of crust to the soft center, cake to frosting, or in this case, warm, gooey pears, and oh-so-tender gingerbread.

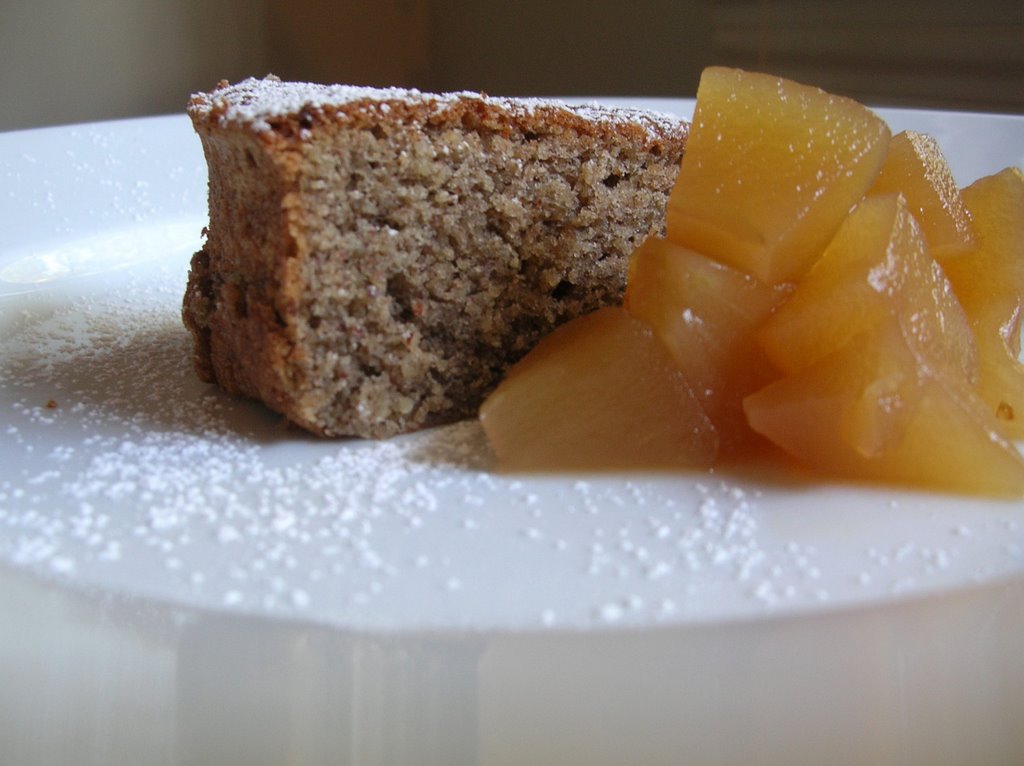
I have to admit there was nothing wrong with this cake, but last night, around 10:00 pm, eastern standard, you could find me hovering over the cake plate, slicing off the top half of a second piece of cake, just so I could eat the goopy pear topping, which had somehow transformed itself in the oven to a almost pudding-like texture. I threw the rest of the piece of the cake away, and never looked back.

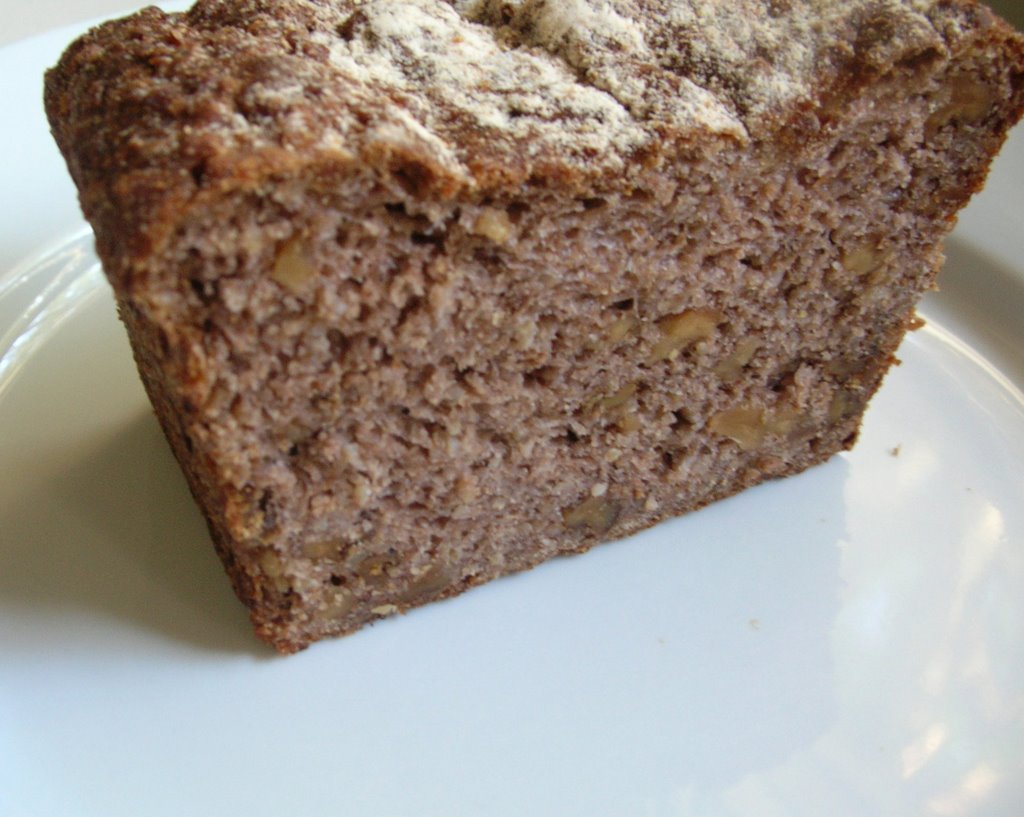
I had read a few rave reviews of this cake in various places online, and when I recently bought Leslie Mackie's Macrina Bakery and Cafe Cookbook, it was one of the first recipes I tagged to try (after the Cracked Wheat Walnut Cider Loaf). I was torn between trying this recipe and a very similar recipe out of one of my favorite cookbooks, but ended up deciding on Leslie's recipe because of the copious amount of buttermilk called for - surely a sign of a tender and deliciously moist cake.

This cake was good, but admittedly, I don't think I'd make it again. Not to say that you might not love it, but although I loved how tender and moist the cake turned out, I expect something different from my gingerbread. I want it to be sticky, dark, and dense. I should also admit that skipping the fresh ginger might have made the cake less spectacular, so if you want to try this cake, definitely go for the bite of fresh ginger (mine was moldy, so I passed). I think a scoop of vanilla ice cream, or whipped cream would have been a wonderful accompaniment.

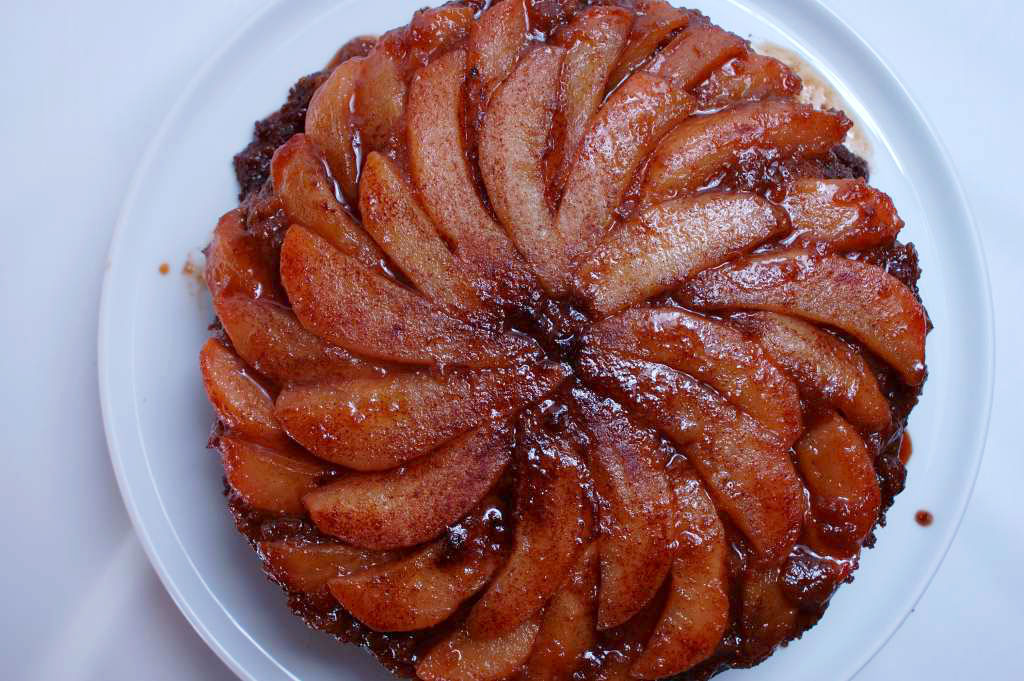
Ginger Pear Upside-Down Cake
Adapted Slightly from Leslie Mackie’s Macrina Bakery & CafĂ© Cookbook

The Pear Topping:
3 Tbs unsalted butter
½ cup light brown sugar
1 ½ tsp ground cinnamon
4-5 medium to large ripe (but not soft) pears, peeled, cored, and quartered lengthwise (I had to cut mine into eigths to make it work out)

The Gingerbread:
8 ounces (2 sticks) unsalted butter, at room temperature
¾ cup light brown sugar
2 Tbs peeled, grated ginger (I substituted 2 teaspoons ground ginger)
3 large eggs
2/3 cup molasses
3 cups unbleached all-purpose flour (I substituted a combination of spelt and whole wheat pastry flour)
1 ½ tsp baking powder
1 ½ tsp baking soda
½ tsp salt
1 ½ cups buttermilk, room temperature


Preheat the oven to 325 degrees Fahrenheit. Butter a 9-inch springform pan, and line the bottom with a 10-inch circle of parchment paper.

For the pear topping, combine 3 Tbs butter, ½ cup brown sugar, and cinnamon in a medium saucepan. Melt the butter over medium low heat until melted; then pour the mixture into the prepared springform pan, completely coating the parchment paper. Place the quartered pears on top of the butter-sugar mixture, lining the pieces up in a circle so that the entire bottom of the pan is covered.

For the gingerbread, cut 2 sticks of butter into 1-inch pieces, and put them in a large mixing bowl. Add ¾ cup brown sugar, and cream the mixture on medium speed for 3-5 minutes, until it is smooth and pale. Add the grated ginger (if using), and beat 1 minute more. Scrape down the sides of the bowl with a rubber spatula. Add the eggs one at a time, beating on low speed and making sure that each egg is fully incorporated before adding another. When all the eggs have been added, slowly pour in the molasses and beat to fully mix. The mixture might look as though it is curdling, but don’t worry—it will come together.

In a separate medium bowl, sift together the flour, baking powder, baking soda, (and ground ginger if using) and salt. Whisk to fully combine.

Alternately add small amounts of flour and buttermilk to the batter, stirring and folding with a rubber spatula until the dry ingredients are just absorbed. Do not overmix the batter. Pour and scrape the batter into the pear-lined pan, smoothing the top with a rubber surface. The pan will be nearly full.

Carefully transfer the pan to the center rack of the oven, and bake for about 1 hour and 45 minutes, until a skewer inserted in the cake’s center comes out clean. Let the cake cool in the pan for 10 minutes on a wire rack. Cover the pan with an upside-down serving plate; then carefully invert them together. Release the sides of the pan, and lift it away. Gently lift the pan’s base off the cake, and peel away the parchment paper. Allow the cake to cool for a half hour or so, and serve warm, with whipped cream.


Note from the Baker :

I had quite a lot of batter leftover, so I used some of my silicone canneles molds, and got 8 little mini gingerbreads out of it; not sure where all the extra batter came from, but the little cakes sure turned out cute!

Monday, October 23

When Work Takes Over...


Whoa - work has been so busy lately that I've barely had time to exhale, and least of all, get into the kitchen and cook something worth posting about! My position at work has shifted over the last month, and I'm basically learning on the job - figuring it out as I go now - which means a new level of stress that I'm not yet used to.

This is great for my career, but I need to tilt the scales a bit and get back in balance. I've hated not having time to dreamily flip through my cookbooks on the weekend and choose our menu for the upcoming week - lately it's been a mad rush to the store on the way home from somewhere else on Sunday evening, and by the time we eat most nights, I'm already thinking about something else before I've finished my last sip of wine, and I'm back to the computer or books.

Well, I've had enough of that! Cooking is a part of my life - a passion that I'm not ready to sacrifice to a busy schedule.

This Sunday Dustin and I were trying come up with a list of dishes that we haven't eaten in a long time, since we've been relying on old standards lately. Our list is our menu for this week - Roast Pork with Brussel Sprouts, Pesto Chicken Pasta (to use up the 4 pounds of basil still in the garden), a Squash Souffle (from this month's Gourmet), Risotto with Raddichio, and finally, our Sunday night Supper - Chilaquiles.

If you've never had Chilaquiles before, and have been turned off by their messy and unsophisticated nature - think again. Chilaquiles are everything that I love about Mexican Food - warm, rich with the flavor of toasted corn and smoky chiles, and a fabulous excuse to eat all the best condiments - Avocados, Sour Cream, Crumbly, Salty Cheese, and Cholula. With a cold beer, it's the perfect thing to remind me why I love to spend time in my kitchen - to slow down, create something beautiful and delicious, and celebrate daily life.

This recipe is wonderfully simple, but if you want to make it even simpler, you could substitute a good-quality Tomatillo Salsa for the Homemade. It will lack some of the sweet nuance of a homemade sauce, but I'll admit it's just as good. I've had good results with Rick Bayless' Tomatillo Salsa, sold in Whole Foods.

Chilaquiles with Salsa Verde
Adapted from Mexican, by Williams Sonoma

1 lb. tomatillos, husked and rinsed
4 serrano chilies
2 cloves garlic
½ white onion, coarsely chopped, plus 1 or
more thin white onion slices, separated into rings for garnish
1 tablespoon canola or safflower oil
A pinch of sea salt, plus more, to taste
½ lb. thick tortilla chips (the thicker the better)
2 cups shredded chicken (optional, but recommended)
¼ cup coarsely chopped fresh cilantro, plus leaves for garnish
1 cup crema or sour cream
½ cup crumbled queso fresco or mild feta cheese
1 Avocado, sliced into thin lengths

Place the tomatillos in a small saucepan and add water to barely cover. Bring to a simmer and cook until the tomatillos soften, about 10 minutes. Add the chilies and garlic and continue to cook until the tomatillos are completely soft, about 5 minutes more. Remove from the heat.

Using a slotted spoon, transfer the tomatillos, chilies and garlic to a blender; reserve the cooking liquid. Add the chopped onion and 1/2 cup of the cooking liquid to the blender and process until well blended.

In a heavy skillet or saucepan over medium-high heat, warm the oil. Pour in the tomatillo mixture all at once and stir vigorously. Stir in an additional 1⁄2 cup of the reserved cooking liquid along with a pinch of sea salt. Reduce the heat to low and cook, uncovered, until the sauce thickens, about 10 minutes. Add more liquid if necessary.

Just before serving, carefully fold the tortilla chips, chicken and cilantro into the sauce and continue cooking until softened but not mushy, about 5 minutes. Taste and adjust the seasonings with sea salt.

Scoop the mixture into 4 shallow bowls, and top with sliced onion rings, sour cream, queso, avocado and additional cilantro leaves, if desired. Serves 4.

Serves 4

Monday, October 2

Love, Despite Looks


This loaf of bread had me worried. I paused my breadmaking session on Sunday while Dustin and I went for an impromptu two and a half hour walk, and stuck my bread in the fridge to tame those hungry little yeasts while we were gone, which I've heard is a legitimate thing to do, but when I returned from my walk, I opened the refrigerator door in anticipation, and my bread had risen so high that it was squished up against the top of the next shelf!

If I were a calm and patient baker, I would have punched down the loaf, rolled it up again into a little swaddle of bread dough, and let it rise while we had our Spaghetti and Meatballs for dinner (it was my turn to choose our Sunday supper), and then popped it in the oven and all would have been tall and rounded in the land of happy bread loaves. Instead, I chose to make due with the deformed loaf I had on my hands, and throw caution to the wind by sending it off to meet it's fate in a 385 degree oven.

The loaf came out flat and rather homely looking, but I wasn't about to give up on it just yet. I mean, if ever a bread and I were destined for true love, it had to be this Cracked Wheat Walnut Cider Loaf. Wholesome and rich with the taste of toasty walnuts, along with the substance and toothsome quality that bulgar would add, and the seductively unknown taste of cider in a loaf of bread? Wow, I'm still getting excited about it again, even after my botched first attempt.

The point is though, despite appearances, this is a bread to love. It might not seduce you with a tall and stately domed top, or a golden brown crust, but what it lacks in beauty, it makes up for in character. The bread turned out a fabulous purplish shade of brown, flecked with walnuts and bits of bulgar, and it is so wonderfully moist. I had a slice for breakfast with some pumpkin butter, and a slice for lunch with my broccoli soup. Plans for the rest of the loaf include a turkey and munster sandwich tomorrow, and then it's going to play host to some creamy goat cheese, served alongside a bowl of lentils for dinner tomorrow. This is one hardworking bread!

I have plans to make this bread again very soon, and I can't wait to see how it will turn out if I give it the proper space it needs to rise!

Cracked Wheat Walnut Cider Loaf
Adapted from Macrina Bakery, by Leslie Mackie

3/4 cup cracked wheat
1 cup boiling water
1 1/2 cups walnut halves
1 1/4 cups apple cider
1 1/2 teaspoons dried yeast
2 tablespoons honey
1 cup and 1 tablespoon coarse whole wheat flour
2 1/4 cups King Arthur's white wheat flour
2 teaspoons kosher salt
1/2 cup canola oil

Place the cracked wheat in a small bowl and cover with boiling water. Stir with a wooden spoon to make sure all wheat is moistened. Let sit, uncovered, for 10 minutes while liquid is being absorbed.

Preheat the oven to 325 degrees and spread the walnuts on a rimmed baking sheet to bake in the oven for about 10 minutes. Check the nuts after about 7 minutes though, to be sure they aren't browning too deeply. Remove the nuts form the oven and let cool. Coarsely chop and set aside.

Place apple cider in a medium saucepan and warm over low heat, until just warm to the touch. Pour the warm cider into the bowl of an electric mixer, fitted with the dough hook. Add the yeast and honey and whisk until the yeast is dissolved. Let mixture sit for 5 minutes. Add plumped cracked wheat, 1 cup whole wheat flour, the white wheat flour, kosher salt and canola oil. Mix on low speed for one minute, then increase the speed to medium and beat for 10 minutes. The dough will form a loose ball at the base of the hook. Add the walnuts and beat for an additional 2 minutes. Be sure to watch your mixture toward the end - they have a tendency to "hop" when they are working hard, and might hop right off your countertop!

Transfer the dough to an oiled, medium bowl and cover with plastic wrap. Let proof in a warm room, 70 - 75 degrees for 2 hours. Dough will almost double in size. The dough is done rising when you can poke your finger into it and the indentation stays. Punch down the dough and turn out onto a lightly floured work surface. The dough will be sticky, but don't add more flour. Gently shape the dough into a 12 by 6 inch log, with the long end facing you. Turn the egdes in to meet in the middle, then start rolling the dough away from you into a loaf, and place the loaf in a 9 x 5 x 4 inch oiled loaf pan. Cover with plastic wrap and let proof at room temperature about an hour, or until the loaf rises slightly above the pan.

While the loaf is proofing, preheat the oven to 385 degrees. Remove the plastic from the loaf and dust with the remaining tablespoon of whole wheat flour. Place the pan on the center rack of the oven and bake for approximately 50 minutes. The finished loaf will be medium brown on top. Let the loaf cool in the pan for 30 minutes on a wire rack, then run a sharp knife around the edges of the pan to invert the bread onto the rack to cool completely.

Makes One Loaf

Sunday, October 1

Buckwheat Cake with Cider Poached Apples


This is the perfect fall cake. The color of the buckwheat-flecked cake, and the shiny and jewel-like apples are both beautiful and delicious. The cake is moist and rich, with butter, almonds, and egg yolks, and just a touch of buckwheat flour to hold it together, then lightened up with the addition of egg whites, beaten with sugar until they look like fluffy meringue.

The apples are poached in a mixture of cider and a few simple spices, which smell heavenly while they are soaking up the juice that will turn them almost transparent, and flavor them with subtle notes of clove and cinnamon. I love desserts which provide texture or contrast, and this one does just that. I couldn't decide which I liked better; taking a bite of cake, followed by a bit of apple, or if I preferred to combine the two in one bite. You'll have to make that choice yourself.

The cake would also be incredible with any number of other fruits or fruit syrups. Blood oranges, plums, and apricots come to mind. And this recipe once again comes from the incredible David Lebovitz, whose desserts are perfection in my book.

Buckwheat Cake with Cider Poached Apples
From Ripe for Dessert, by David Lebovitz

For the Buckwheat Cake:
1 ½ cups sliced almonds
½ cup buckwheat flour
1 tsp baking powder
12 Tbsps unsalted butter, at room temperature
½ cup sugar
6 Tbsp sugar
1 tsp vanilla
4 large eggs, room temperature, separated
¼ tsp salt
¼ tsp cream of tarter, (optional)

For the Apples:
3 cups apple cider or unsweetened apple juice
½ cup sugar
1 stick cinnamon
5 whole cloves
2 - 3 firm apples (Granny Smith or Golden Delicious)
powdered sugar, for dusting

Position a rack in the center of the oven and preheat the oven to 350 degrees. Butter a 9 by 2-inch round cake pan and line the bottom with parchment paper.

To make the buckwheat cake: In a food processor, pulse the almonds with the buckwheat flour and baking powder until the almonds are finely ground.

In the bowl of an electric mixer, or by hand, beat together the butter and 1/2 cup sugar until very light and fluffy, 3-5 minutes if using a mixer. Beat in the vanilla and the egg yolks one at a time, scraping the sides of the bowl as necessary.

In a separate glass or metal bowl, whip the egg whites until they become frothy. Add the salt and the cream of tartar, if using, and continue to whip until the whites begin to hold their shape. Gradually whip in the 6 tablespoons of sugar and keep whipping until the whites form soft, shiny peaks.

Blend the almond and buckwheat mixture into the creamed butter and egg yolk mixture with a rubber spatula. Stir about a third of the beaten egg whites into the batter. It will be thick, but this will lighten it up. Then carefully fold in the remaining egg whites until just incorporated. Don't overfold!

Transfer the batter to the prepared cake pan, smooth the top and bake for 45 minutes, until a toothpick inserted in the middle comes out clean. Cool on a wire rack.

To poach the apples: Warm the cider, sugar and spices in a medium saucepan. Peel the apples with a vegetable peeler and use a 1/2 inch melon baller to make the apple balls.

Drop the apple balls into the cider mixture and simmer gently for 10 minutes, or until tender.

Notes:
The apples definitely take longer than 10 minutes - I probably cooked mine for 40 and then reduced the liquid even further. I didn't have a melon baller, so I just made large chunks.

Vermont Farm Table